close

Jack Delrose

Pet

The One-Person Bird: Dealing with Parrots That Attack Your Spouse

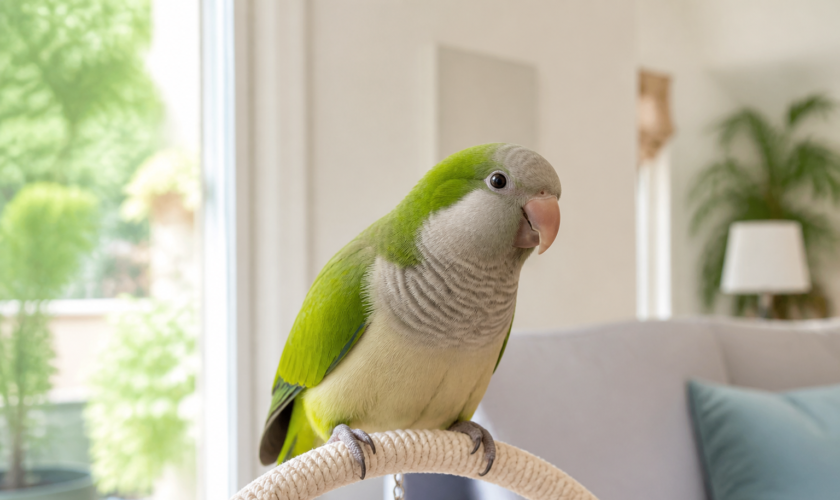
Bringing a companion parrot into a shared household often starts with high hopes of communal snuggles, shared whistling sessions, and lighthearted flock dynamics. Then reality sets in. The bird forms an ironclad bond with one person, views the other as an intolerable trespasser, and mounts an aerial assault the second the “intruder” enters the kitchen.
When a parrot singles out a spouse for hostility, the household dynamic deteriorates fast. Partners feel betrayed, spouses feel terrorized in their own living rooms, and the bird spends half its day on high alert, defending its chosen territory. Fixing this problem does not require dominating the bird or forcing unwanted handling. It requires understanding avian psychology, restructuring daily interactions, and methodically dismantling the accidental incentives humans create.

The Anatomy of the Feathery Love Triangle

In the wild, most parrot species are strictly monogamous during the breeding season, and many pair for life. They feed each other, preen hard-to-reach feathers around the head and neck, and defend their nesting territory against competitors. Parrots do not view human households through the lens of a domestic pack animal like a dog. They view the household as a flock composed of potential mates, rival pairs, and territory threats.
When a parrot is kept in captivity without a conspecific companion, its biological drive to form a pair bond does not vanish. Instead, the bird redirects that instinct toward the human who spends the most time with it, shares the best food, or provides the most physical attention.
Once that bond forms, the parrot perceives the chosen human as its reproductive partner. In the bird’s mind, your spouse is not a beloved family member or a benign roommate. Your spouse is an active rival competing for the bird’s mate, or an interloper occupying precious territory. The aggression that follows—lunging, hissing, dive-bombing, and skin-breaking bites—is standard wild behavior deployed to drive a competitor away from the nest.

How Humans Accidentally Fuel the Conflict

Most bird owners do not realize they are actively nurturing their parrot’s jealousy. Parrots communicate through subtle body language and social rituals, and humans routinely misinterpret these signals, accidentally confirming the bird’s romantic delusions.

The Problem with Physical Affection

The way you pet your parrot matters more than almost anything else. Wild parrots only permit flock mates to preen their heads and necks. Touching along the back, under the wings, along the tail, or near the vent is exclusively reserved for mating pairs. When the favored human cuddles a parrot down its spine or lets it burrow under a shirt, the human is sending explicit reproductive signals. The bird assumes a reciprocal courtship is underway, which supercharges its protective aggression toward anyone else nearby.

The Allure of the Drama Reward

Parrots thrive on theatrical energy. In the wild, alarm calls, flashing wings, and loud screeches mean high excitement. When your spouse walks into the room and gets bitten, their natural reaction is to flinch, shout, wave their arms, and retreat.
To a parrot, this reaction is a double win. First, the unwanted intruder left the room, proving that aggression works. Second, the screaming and flailing provided an adrenaline-fueled entertainment spectacle known as a drama reward. If lunging at your spouse produces loud noises and dramatic gestures, your parrot will continue doing it purely for the thrill.

Displaced Aggression

One of the most confusing behaviors in a jealous parrot is when it bites the favored person while glaring at the spouse. This is known as displaced aggression. In the wild, if a rival approaches a pair and the mate does not immediately help chase the intruder off, the agitated bird will redirect its frustration onto its partner to drive them into action. If your parrot is perched on your shoulder and bites your neck the moment your partner enters the room, the bird is punishing you for tolerating the rival’s presence.

Resetting Boundaries for the Favored Human

Resolving pair-bond aggression requires the favored human to step back. You cannot expect the bird to accept your spouse if you continue acting like the bird’s exclusive romantic partner. The goal is to transition your relationship from “exclusive mate” to “benevolent flock member.”
First, overhaul your petting habits immediately. Head and neck scratches only. Any contact below the neck must cease entirely. If the bird attempts to solicit courtship by regurgitating food, dropping its wings, panting, or lifting its tail, stand up calmly, place the bird on a stand, and walk away for several minutes. Do not scold or speak; simply withdraw your attention.
Second, eliminate environmental triggers that stimulate reproductive hormones:
  • Ensure the bird receives twelve hours of uninterrupted, quiet darkness every night to simulate the non-breeding season.
  • Remove all dark, enclosed spaces from the cage and play areas. Cardboard boxes, fabric sleeping huts, hollow toys, and dark corners behind couch cushions mimic tree hollows and trigger fierce territorial nesting defenses.
  • Cut back on warm, high-carbohydrate, or high-fat foods like warm oatmeal, table scraps, and heavy seed mixes. Feed a high-grade pellet base balanced with fresh leafy greens and vegetables.
Third, stop letting the bird ride on your shoulder. Perching on the shoulder places the bird at eye level, gives it access to vulnerable facial tissue, and encourages feelings of dominance and possessiveness. Restrict out-of-cage perching to your forearm, hand, or designated stands.

The Reconnection Blueprint for the Targeted Spouse

While the favored human reduces romantic triggers, the targeted spouse must begin a systematic program of positive reinforcement. This process cannot be rushed, and it must never involve forced physical contact. Pushing a parrot to step onto the hand of someone it dislikes will only result in severe bites and reinforce the bird’s fear.

The Sole Supplier Strategy

From this point forward, the favored human is no longer allowed to hand out the bird’s absolute favorite treats. Identify the single food item the parrot values above all else—typically raw almonds, pine nuts, walnut pieces, or sunflower seeds.
The targeted spouse becomes the exclusive gatekeeper of this reward. Whenever the spouse enters the room, they toss a small piece of the high-value treat into the bird’s food bowl or hand it over using a long spoon or skewer, then keep moving. The spouse does not linger, stare directly into the bird’s eyes, or attempt to pet it.
Over several weeks, the parrot’s internal association shifts. The spouse ceases to be an intruder bringing territorial tension and becomes the bearer of extraordinary rewards.

Hands-Off Engagement Through Target Training

Target training using a simple wooden chopstick and a clicker provides a safe, communication-rich bridge between the spouse and the parrot.
The mechanic is straightforward: the spouse presents the tip of the chopstick through the cage bars or across a play stand. The instant the curious parrot touches the tip with its beak, the spouse clicks (or marks with a clear word like “good”) and delivers a high-value treat.
Target training bypasses the need for physical touch while giving the bird control over the interaction. It allows the spouse to guide the bird into its cage, onto a perch, or away from the doorway without using hands, toweling, or physical confrontation. A bird that willingly plays a training game with someone is a bird that is learning to view that person as a safe, predictable companion.

Establishing Neutral Territory

Parrots are intensely territorial around their primary cages. If the spouse attempts to interact with the bird while it is perched on or inside its home cage, defensive aggression is almost guaranteed.
Move interactions to a neutral room that the bird does not associate with nesting, sleeping, or exclusive one-on-one snuggles with the favored human. A portable T-stand placed in an office, dining area, or spare room creates an environment where the parrot feels less compelled to defend a home turf. When the bird’s territorial instincts are disarmed by unfamiliar surroundings, it becomes substantially more receptive to calm interaction from the spouse.

Reading Body Language Before the Strike

Parrots rarely bite without warning. They communicate discomfort and boundary violations long before they lunge, but humans frequently miss the cues. Both partners must learn to spot the micro-signals that indicate an attack is brewing.
Signs of escalating arousal and impending aggression include:
  • Eye pinning: The rapid dilation and constriction of the pupils.
  • Feather posture: Feathers flared across the back of the neck, crest raised high (in cockatoos and cockatiels), or tail feathers spread wide like a fan.
  • Body tension: Lowered head, horizontal posture, beak slightly parted, or swaying side-to-side with a stiff gait.
  • Vocalizations: Low growling, hissing, or sharp clicking sounds.
If the spouse spots any of these warning signs, they should immediately stop advancing. Back away slowly and casually, without gasping or making sudden moves. Waiting for the parrot to physically bite before changing your behavior teaches the bird that subtle communication fails and only physical violence works.

Building Lasting Harmony

Patience is the defining variable in resolving pair-bond aggression. A parrot that spent three years aggressively defending its favorite person will not surrender that habit in forty-eight hours. Neurological pathways and behavioral routines take months of quiet, steady consistency to rewrite.
Set realistic benchmarks for success. Your parrot may never choose to sleep on your spouse’s chest or solicit head scratches from them, and that is completely acceptable. The true objective is peaceful coexistence: a parrot that steps up on a target stick, takes treats politely, stays relaxed when your spouse enters the room, and respects the shared spaces of the home without resorting to violence.
By eliminating romantic human behaviors, transferring high-value rewards to the excluded partner, and respecting the bird’s need for personal agency, you can dismantle the household love triangle and build a stable, multi-person flock.
read more
Dog

Specialist Guide to Residential Dog Training for Safer Household Behaviour

Residential dog training for safer household behaviour should be understood as structured professional support, not a quick way to outsource responsibility. A dog may spend time with trainers, but the family still needs to understand what has changed, how to maintain progress and what routines must continue at home. The handover matters as much as the training period itself.

Owners often consider structured residential support when behaviour has become difficult to manage in normal life. That might involve pulling, poor recall, overexcitement, door behaviour, anxiety, poor manners around visitors or a lack of basic control. The aim should be safer, calmer living, not a dramatic transformation that ignores the dog’s welfare or the owner’s role.

TotalK9 explains that residential dog training works best when the owner is honest about the problem, the dog’s routine and the home environment. The specialist input should identify what the dog is struggling with, what can realistically be improved and how the family should continue after collection. This matters because behaviour does not exist in isolation. A dog that learns better habits in a structured setting still returns to the same doors, people, pavements, visitors and household expectations. The owner therefore needs practical guidance, not just a report that training has taken place. That guidance should feel usable at home, especially when the old triggers appear again in familiar rooms and on familiar walks.

Start With the Behaviour, Not the Label

Owners sometimes describe a dog as stubborn, naughty or dominant when the real issue is unclear communication, anxiety, over-arousal or lack of structure. A professional assessment should look at what the dog is actually doing, when it happens and what the household does in response. Labels can be emotionally satisfying, but they rarely solve the problem.

A better starting point is specific observation. Does the dog pull towards people, bark at the door, ignore recall in open spaces or become unsettled around visitors? How often does it happen? What makes it worse? What has already been tried? These details help shape a training plan that addresses behaviour rather than assumptions.

A useful test for start with the behaviour, not the label is whether the plan still works when the home is tired, noisy or slightly rushed. Many ownership problems appear in those ordinary moments rather than in carefully prepared demonstrations. The family should imagine the same point on a wet evening, during a school run, when a visitor arrives early or when the handler is distracted. If the answer depends on everyone behaving perfectly, the plan needs simplifying. Responsible ownership is built around routines that remain clear when life is imperfect.

The Residential Setting Creates Clarity

A residential setting can give the dog a consistent structure away from the patterns that may be reinforcing the problem at home. Trainers can work on routines, obedience, manners and confidence in a controlled way. That structure can be useful for dogs that have become confused by mixed signals or inconsistent handling.

The setting itself is not magic. It works because the dog receives clearer information and repeated practice from people who understand timing and progression. Owners should see the residential period as a focused intervention, not a replacement for their own involvement. The dog still needs the family to continue the message afterwards.

The UK context makes the residential setting creates clarity practical rather than theoretical. Owners have neighbours, pavements, delivery drivers, visitors and local expectations to consider. The dog may live on private property, but the handler’s responsibility extends to every moment where another person could be affected or confused. Thinking in this grounded way helps the family avoid exaggerated claims and keeps the conversation focused on controlled, welfare-led handling. A serious plan should make sense to the household and to a cautious outside observer.

Handover Turns Training Into Home Behaviour

The handover is where progress becomes practical. Owners should learn what commands have been used, how to reward, how to correct calmly, what to avoid and how to manage the situations that caused problems before. A short explanation is rarely enough if the behaviour has been difficult for a long time. The owner needs to practise and ask questions.

A good handover should also be honest about limits. Some behaviours need ongoing management, gradual exposure or follow-up support. The goal is not to pretend the dog has become perfect. The goal is to give the owner a clearer, safer way to handle the dog in the real situations that matter.

Families should also ask who owns this part of the routine. If the answer is everyone, it often becomes no one. One adult may lead the dog, another may support visitor management, and children may have simple rules to follow, but the responsibility should not blur. Clear ownership prevents mixed signals and gives the dog a more predictable environment. It also makes follow-up advice easier because the professional can speak to the person who is actually handling the behaviour day after day.

Family Consistency Protects the Progress

When the dog returns home, every adult should understand the new routine. If one person follows the trainer’s guidance and another allows old habits, progress can fade quickly. Children should also receive simple, age-appropriate instructions. Consistency does not mean everyone becomes a trainer, but it does mean the household stops sending mixed messages.

This is especially important around doors, walks, feeding, furniture and visitors. These are the places where old habits often reappear. A family that agrees on the rules before the dog comes back is more likely to maintain the improvement. The dog benefits because the environment feels clearer.

It helps to separate reassurance from pressure. A family may want to feel safer, but the dog should not be asked to carry every worry in the house. Good handling keeps the animal’s role clear and proportionate. The owner still uses locks, lighting, judgement, neighbour awareness and sensible routines. The dog contributes to the wider picture, but it is not turned into the only answer. That balance is healthier for the family and fairer to the animal.

Safer Behaviour Is Often Built From Small Skills

Safety is not always about dramatic obedience. It is often built from small skills that make daily life easier: waiting calmly, walking without pulling, coming when called, settling when asked and accepting visitor routines. These behaviours reduce conflict because the handler has ways to guide the dog before excitement becomes too high.

Owners should value these foundations. A dog that can settle on cue may be safer around guests. A dog that walks calmly may be easier to manage in public. A dog that responds to recall gives the owner more control. Small skills are not minor when they change the shape of everyday life.

This part of the plan should be discussed before the dog arrives, not after the household is already improvising. A short conversation can identify where confusion is likely: a side door, a visiting relative, a busy school morning or a handler who travels for work. Once those details are named, the family can decide what procedure to follow. Preparation does not remove every surprise, but it gives the handler a calm starting point instead of a rushed reaction.

Welfare Should Stay at the Centre

Training should be ethical, controlled and welfare-led. A dog that is frightened, overwhelmed or punished without understanding is unlikely to become safer in a meaningful way. Owners should expect professional trainers to consider the dog’s age, health, temperament, confidence and history. Behaviour improvement should not come from intimidation.

Welfare also includes rest, suitable exercise, nutrition and emotional balance during the training period. Owners should ask how the dog will be cared for, how progress will be judged and what happens if the dog needs a different pace. A humane approach is not softer on outcomes; it is often what makes outcomes sustainable.

The welfare question is simple: does this arrangement help the dog understand what is expected, or does it leave the animal guessing? Clear routines, rest, measured exercise and calm handling all reduce unnecessary stress. A dog that understands the household is more likely to remain settled and responsive. Welfare is therefore not a soft extra beside safety. It is one of the conditions that makes safe ownership possible over months and years.

Plan the Return Home Before Collection

The dog should not return to a chaotic version of the old routine. Before collection, the family should prepare the home, agree the rules and remove obvious triggers where possible. If the dog struggled at the front door, the door routine should be ready. If walks were the issue, the handler should know the first route and equipment.

Owners should also schedule follow-up if recommended. The first days after return are important because the dog is transferring learning back into the family environment. Calm repetition, patience and professional support can help the progress settle. The result should be a home that feels safer because the people and the dog understand each other more clearly.

Professional advice is most valuable when the owner is honest. If the home is busy, say so. If children forget rules, say so. If the handler lacks confidence at the door, that should be part of the conversation. A good match is not created by pretending the household is calmer or more experienced than it is. It is created by matching the dog, the training and the support to the real environment where the animal will live.

It is useful for owners to keep a simple diary after the dog returns. Notes on walks, visitors, settling and any difficult moments can make follow-up advice more precise. The diary does not need to be long. It simply helps separate patterns from isolated incidents, which is valuable when behaviour has previously felt confusing.

Owners should also avoid testing the dog too quickly. Inviting the hardest visitor, choosing the busiest walk or recreating the old problem may undermine confidence. Progress is better protected through gradual, thoughtful practice. The aim is to make better behaviour normal, not to prove everything in a single day.

Owners should keep records of the guidance they receive. Notes on commands, routines, visitor handling, exercise and follow-up support can prevent misunderstanding later. In a busy family, verbal advice is easy to remember differently. A written reference helps adults stay aligned and gives the handler something concrete to revisit when life becomes hectic. It also shows that the dog is being treated as a serious responsibility rather than an impulse purchase or a passing security idea.

Finally, the family should protect the relationship as carefully as the training. A dog that trusts its handler is easier to guide, and a handler who understands the dog is more likely to make sensible decisions. Trust is built through calm repetition, fair boundaries, appropriate rest and a willingness to learn. When that relationship is strong, the dog is not simply present in the home. It is understood by the home, which is a much more sustainable foundation.

There is also value in reviewing the arrangement after the first week, the first month and the first change in routine. Homes evolve quickly. A school timetable changes, a new visitor becomes regular, work patterns shift or the dog settles differently from expected. A short review helps the family notice whether the original plan still works. It also creates a natural point to seek advice before habits become fixed. The review should be calm and practical, focused on what helps the dog and the people live together more clearly.

The long-term measure of success is not whether the dog creates a dramatic impression. It is whether the household feels more organised, the handler feels supported and the animal has a stable, welfare-led life. That kind of success is quieter than many buyers imagine. It is seen in calm door routines, respectful children, controlled walks, predictable rest and owners who do not exaggerate the dog’s role. Those ordinary signs are often the best evidence that the decision has been made responsibly.

Owners should keep records of the guidance they receive. Notes on commands, routines, visitor handling, exercise and follow-up support can prevent misunderstanding later. In a busy family, verbal advice is easy to remember differently. A written reference helps adults stay aligned and gives the handler something concrete to revisit when life becomes hectic. It also shows that the dog is being treated as a serious responsibility rather than an impulse purchase or a passing security idea.

read more
Veterinary

Carrier Phobia: Stress-Free Loading for the Vet-Hating Cat

The scene is painfully familiar to millions of cat owners. The appointment is scheduled for ten in the morning. At nine-fifteen, you ease open the back of the hallway closet, reach past winter coats, and drag out the plastic travel crate. The hollow rattle of the wire door barely echoes through the hallway before you realize the room is utterly empty. Your cat, possessing an uncanny sixth sense for veterinary visits, has already dematerialized.
Ten frantic minutes later, you find yourself on your knees with a flashlight, peering under the guest bed, trying to dislodge an eight-pound feline who has suddenly developed the gripping strength of a rock climber. When you finally extricate them, the undignified wrestling match begins: you attempt to maneuver four stiffened, splayed legs into a narrow plastic opening, your cat bracing every limb against the frame like an unyielding starfish. By the time the door latches, your forearms are scratched, your cat is hyperventilating, and your own heart rate is through the roof before you have even backed the car out of the driveway.
Carrier phobia is one of the primary reasons routine feline veterinary care lapses. When transporting a pet feels like psychological warfare, owners inevitably delay wellness checks, dental cleanings, and early symptom investigations until an issue becomes an overt emergency. Overcoming this dreaded standoff does not require brute physical force or sheer luck. It demands an understanding of feline behavioral psychology, a strategic overhaul of the travel environment, and tactical handling methods designed to preserve your cat’s sense of safety.

Deconstructing the Fear: Why the Box Triggers Terror

Cats are famous for climbing into empty shoeboxes, discarded cardboard packaging, and cramped laundry baskets of their own volition. Why, then, does a padded pet carrier produce such visceral horror?
The distinction lies entirely in control and predictive conditioning. When a cat explores an open cardboard box on the living room rug, they retain absolute agency. They can step inside, turn around, peer out, and leap clear at the first sign of a threat. A travel carrier, by contrast, represents the immediate, irreversible loss of territory and autonomy.
Worse, the carrier is rarely a neutral household fixture. For most cats, the crate only materializes once or twice a year. Its sudden appearance from the depths of the basement or garage serves as an unmistakable harbinger of an impending sensory nightmare: an abrupt chase, rough handling, an unsettling vehicle ride full of low-frequency engine vibrations, and arrival at a clinical facility permeated with the chemical scents of disinfectants and the pheromones of terrified animals.
To a cat, the carrier is not a safe haven. It is a sensory trap that directly precedes physical distress.

Upgrading the Hardware: Carrier Design Matters

Before attempting to train or cajole a fearful cat, take a hard, critical look at the vessel you are using. Many carrier designs inadvertently sabotage the loading process by making ingress feel dangerous or confrontational.

Two-Piece Hard Shells with Top-Loading Hatches

Traditional front-loading plastic crates with single metal swing doors are the hardest to manage with a panicked animal. Attempting to shove a struggling cat horizontally into a dark tunnel triggers an immediate, primal claustrophobic escape response.
The gold standard for anxious felines is a rigid plastic carrier with both top and front access, secured by quick-release side latches. Top-loading doors allow you to lower the cat gently into the crate feet-first, eliminating the doorway standoff entirely. Furthermore, carriers with removable top halves are invaluable once you arrive at the clinic. Rather than dragging a frightened cat out of the carrier by their scruff, the veterinarian can quietly unlatch the top shell and conduct eighty percent of the physical exam while the cat remains resting comfortably in the bottom tray.

The Limits of Soft-Sided Duffels

Soft-sided canvas and mesh carriers are lightweight, aesthetically pleasing, and easy to sling over a shoulder. However, they present distinct drawbacks for phobic cats. Under stress, a cat’s claws easily catch in flexible mesh ventilation panels, complicating loading. Additionally, soft-sided walls can sag inward during transit, creating a feeling of constriction that intensifies panic. If you opt for a soft carrier, ensure it features an internal wire frame that maintains its shape regardless of weight or handling.

The Long Game: Desensitizing the Safe Haven

If your veterinary visit is still a few weeks away, you have time to dismantle the negative associations attached to the crate. The goal is simple: transform the carrier into an unremarkable piece of ambient living room furniture.
Bring the carrier out of storage and leave it out permanently. Choose a low-stress, high-traffic communal area, such as the perimeter of the living room or near a sunny window. Remove the door entirely, or secure it in an open position with a zip tie so it cannot swing shut and startle an investigating pet.
Line the interior with a soft, thick fleece blanket that already carries the familiar communal scent of your home. To build positive associations, make the carrier a routine site of delight:
  • Drop high-value treats—such as freeze-dried minnows, roasted poultry shreds, or squeeze tubes of pureed chicken—just inside the entrance, gradually placing them deeper into the carrier over several days.
  • Feed your cat their daily meals directly in front of the carrier, eventually transitioning the food bowl inside the cabin.
  • Spritz the interior bedding with a synthetic feline facial pheromone spray once daily. These compounds mimic the soothing cheek markers cats deposit when rubbing against furniture, chemically signaling that the interior is secure.
When a cat discovers that the carrier is a static, comfortable den where food appears and doors do not slam shut, the sight of the box ceases to trigger an adrenaline dump.

The Go-Day Strategy: Low-Stress Loading Techniques

Desensitization takes time, but appointments cannot always wait. When you must load a resistant cat today, thoughtful preparation will prevent a chaotic showdown.

Secure the Perimeter Early

The single biggest logistical mistake owners make is beginning the loading process with the entire house open. Cats read micro-cues in human body language: the purposeful stride, the nervous tone of voice, the rattling keys. The moment they suspect a hunt is underway, they will bolt under the heaviest, lowest piece of furniture in the house.
Two hours before departure, quietly herd your cat into a small, low-stress room with minimal hiding spots, such as a bathroom, laundry room, or compact home office. Close all closet doors and block access to spaces under beds or dressers using rolled-up towels or storage bins. By shrinking the territory ahead of time, you eliminate the frantic cross-house pursuit that spikes arousal levels before the carrier is even introduced.

The Vertical Gravity Method

If using a top-loading carrier, position the crate on the floor with the top hatch fully opened.
Approach your cat calmly without making direct, prolonged eye contact. Pick them up using a secure two-handed hold: one hand supporting the chest from beneath, and the other firmly cradling their hindquarters and legs together to prevent splaying.
Lower the cat into the carrier rump first, not headfirst. When a cat looks down into an open box, they automatically extend their front legs to push away from the opening. By lowering their rear end into the box first, their field of vision remains focused on the room and on your chest. By the time their back feet touch the soft fleece interior, their body is already nestled inside the frame, allowing you to smoothly fold their front paws inward and click the top hatch shut in one fluid motion.

The Towel Swaddle (The “Purrito”)

For cats that lash out with claws the moment they are lifted, a gentle, secure towel wrap neutralizes defensive movement while providing somatic comfort.
  1. Lay a medium-sized, thick bath towel flat on a table or bed, lightly misted with calming pheromones.
  2. Place the cat on the towel, facing away from you.
  3. Bring one side of the towel snugly over the cat’s back, wrapping it under their chin and tucking it securely beneath their body.
  4. Fold the opposing side of the towel tightly across, pinning all four limbs gently against the torso like a compact burrito, leaving only the head exposed.
  5. Lift the swaddled cat supporting their weight from beneath, guide them smoothly into the carrier, and loosely unwrap the top layer of the towel as you slide them in, leaving the fabric inside as comfortable bedding.

Engineering a Peaceful Transit

The stress of transport does not end when the carrier door latches. The journey between your front door and the veterinary examination room represents an unpredictable gauntlet of shifting light, kinetic motion, and acoustic vibration.
Drape the carrier completely with a dark, breathable sheet or light blanket. Cats are intensely visual predators. Watching the landscape whirl past at forty-five miles per hour through a mesh window or seeing passing cars flash by induces spatial disorientation and panic. Shrouding the carrier creates a dim, quiet cave that encourages the nervous system to downshift.
Carry the crate like a fragile package, not a shopping bag. Swinging the carrier by its top handle creates a nauseating pendulum motion with every human stride. Instead, wrap both arms around the bottom and sides of the carrier, holding it firmly against your torso to stabilize the ride and buffer against sudden bumps.
Level the car seat. Passenger vehicle seats are naturally contoured and tilted backward for human ergonomics. Placing a flat-bottomed plastic carrier onto an angled car seat forces your cat to brace against a perpetually tilted floor. Fold a bath towel and tuck it into the seat crease to create a completely flat, horizontal platform. Thread the seatbelt through the carrier’s designated seatbelt loops or brace the carrier securely on the floorboard behind the front passenger seat—the safest, most vibration-stable zone in the vehicle.

When Behavioral Strategies Need Medical Support

For cats with profound, generalized travel anxiety, behavioral modifications and specialized loading techniques may not be enough to break the panic cycle. Pushing an acutely terrified cat through an appointment without chemical support can lead to trauma, aggressive defensive escalation, and physical injury.
There is zero shame in utilizing pre-visit pharmaceuticals prescribed by your veterinarian. Modern veterinary medicine favors mild, targeted medications such as oral gabapentin, administered two to three hours prior to the scheduled appointment.
Unlike outdated sedatives that merely paralyzed an animal’s muscles while leaving their mental panic fully intact, modern protocols gently dial down central nervous system arousal. They reduce fear, prevent the formation of traumatic memories, and allow the cat to experience the entire car ride and clinic visit in a state of relaxed indifference. Medication is not an admission of training failure; it is an act of basic compassion that clears the path for safer, more consistent preventive medicine.

A Calmer Path Forward

Transforming a vet-averse cat into a calm passenger is not an overnight transformation. It requires unlearning old panic patterns and replacing undignified wrestling matches with methodical, predictable routines.
By upgrading your hardware, leaving the carrier open as a safe everyday retreat, and applying structured handling techniques that respect feline mechanics, you permanently change the emotional trajectory of vet day. The dread evaporates, the scratched forearms become a memory, and your cat receives the life-extending health care they deserve without sacrificing their peace of mind.
read more
Pet

Wheel Dangers: Why Wire Mesh Causes Bumblefoot in Small Pets

The steady, rhythmic whirl of an exercise wheel spinning in the dead of night is a familiar soundtrack for anyone sharing a home with small exotic mammals. To a pet parent, that sound represents vitality, contentment, and healthy energy expenditure. Small rodents like hamsters, fancy rats, mice, gerbils, and hedgehogs possess an astonishing physiological drive to run, routinely covering several miles in a single evening. Because running is so fundamentally woven into their instinctual well-being, providing an exercise wheel feels like the most basic, responsible choice an owner can make.
Yet inside thousands of cages and enclosures, the very device bought to promote physical health is actively destroying it. Despite decades of veterinary warnings, pet supply aisles remain stocked with cheap, traditional exercise wheels constructed from open metal wire rungs or crisscrossed wire mesh. These designs are marketed as durable, easy to clean, and chew-proof. In reality, they are severe mechanical hazards that systematically wear down delicate footpads, pave the way for excruciating bacterial infections, and leave animals permanently crippled.
At the center of this veterinary issue sits ulcerative pododermatitis, commonly known as bumblefoot. Understanding why wire running surfaces trigger this agonizing condition is the first step toward transforming your pet’s enclosure from a hazardous obstacle course into a genuinely safe environment.

The Fragile Architecture of Small Animal Paws

To recognize why metal mesh is so destructive, you have to appreciate the delicate anatomical engineering of a small animal’s foot. Unlike humans, who walk upright with cushioned athletic shoes or thick plantar heels, or predatory animals equipped with dense, shock-absorbing leather pads, small prey animals have exceptionally thin, sensitive footpads.
The plantar surface of a hamster, rat, or hedgehog foot consists of a thin epithelial layer resting over minimal subcutaneous adipose tissue. Beneath this slight cushion of fat sit fine tendon sheaths, blood vessels, and tiny metatarsal or metacarpal bones.
These paws are evolutionary marvels designed for natural substrates: traversing loose, yielding forest loam, scrambling over soft soil, burrowing through decaying leaf litter, and navigating fibrous plant matter. They were never biologically engineered to endure repetitive, high-impact mechanical strikes against hard, unyielding, non-compliant steel wire. When an animal runs on an open metal grid, the normal mechanics of locomotion break down completely.

The Biomechanics of Wire Mesh: How Metal Rungs Inflict Trauma

The damage inflicted by a wire wheel does not happen all at once. It is a slow, compounding erosion driven by physics, friction, and hygiene. Every nighttime running session subjects a pet’s paws to hundreds of thousands of micro-collisions that set the stage for severe tissue failure.

Point Pressure Concentration

The most destructive physical characteristic of a wire wheel is the radical reduction of contact surface area. When an animal steps on a flat, solid floor, their body weight is evenly dispersed across the entire plantar surface of the footpad and toes.
When that same animal runs on a wire mesh or rung wheel, their entire body weight is driven into razor-thin lines of metal only a fraction of a millimeter wide. This creates intense, localized point pressure. Instead of a broad, cushioned dispersal of kinetic force, every stride acts like a miniature hammer strike focused squarely on a minuscule ridge of skin. Over the course of five or six miles a night, this unnatural pressure cuts off localized capillary blood flow, depriving the skin cells of oxygen and starving the underlying tissue.

Repetitive Friction and Micro-Abrasions

Wire mesh wheels do not provide smooth, predictable traction. As an animal sprints, their paws inevitably shift, catch, and slide across the tiny openings and raised welds of the mesh.
This introduces severe shearing forces. The metal edges act like high-grit sandpaper against the thin epidermis. The repetitive scraping strips away the outer stratum corneum, creating invisible micro-fissures and rough calluses. Over time, the skin loses its natural elasticity, begins to peel, and cracks open, exposing raw, vulnerable dermal tissue to the outside environment.

The Sanitation Paradox and Bacterial Inundation

Many owners purchase wire wheels believing they are more hygienic because waste falls through the openings into the bedding below. In practice, the opposite occurs.
Rodents and hedgehogs routinely urinate and defecate while running at top speed. Sticky fecal matter and urine do not vanish through the gaps; they coat the wire rungs, crossbars, and mesh intersections. As urine sits on metal, it oxidizes and corrodes the coating, transforming smooth wire into a pitted, rough surface that traps bacterial colonies.
When an animal runs on this contaminated surface with paws already covered in micro-tears, bacteria find a direct, uninhibited pathway straight into the bloodstream and deep tissue. The primary culprit is almost always Staphylococcus aureus, an opportunistic pathogen that thrives on compromised skin, though Streptococcus and Pseudomonas species frequently join the assault.

The Progression of Bumblefoot: From Mild Irritation to Bone Infection

Ulcerative pododermatitis is not a static rash; it is a progressive, invasive disease that escalates through distinct clinical stages if left unchecked.
In the initial stage, the foot displays mild erythema, or redness. The skin on the heels or toe pads looks thin, shiny, and slightly inflamed, often accompanied by local hair loss. An inattentive owner rarely notices this phase because small animals instinctively hide signs of vulnerability. The pet continues to run, further aggravating the tissue.
In the intermediate stage, the skin breaks open completely. Raw, weeping ulcers develop, typically covered by dark, crusted scabs. The foot swells as the immune system floods the area with white blood cells. Walking becomes visibly uncomfortable; the animal may limp, lift a leg while grooming, or hesitate before climbing. Because rodents cannot express pain through facial expressions, their distress manifests as irritability, decreased appetite, and uncharacteristic aggression when handled.
In the advanced, severe stage, the infection breaches the subcutaneous layers and attacks deep structural tissue. Chronic, pus-filled abscesses form within the footpad, distorting the anatomy of the foot. The infection travels upward along the tendon sheaths, eventually penetrating the periosteum of the foot bones, a catastrophic condition known as osteomyelitis.
Once the bone becomes infected and necrotic, the damage is frequently irreversible. The joints fuse, the foot permanently deforms, and systemic sepsis threatens the animal’s life. At this point, aggressive veterinary intervention, including systemic antibiotics, surgical debridement, or complete limb amputation, becomes the only option to save the pet from a agonizing death.

Secondary Hazards: Entanglement and Skeletal Trauma

While bumblefoot is the primary chronic consequence of wire wheels, it is far from the only danger. Wire wheels are notorious in veterinary emergency rooms for causing acute orthopedic trauma.
Open-wire wheels frequently utilize a central metal axle with support struts that slice through the interior space like the blades of a dull fan. When an animal runs at high speed, a single misstep can send a foot, toe, or tail slipping through the gaps between the rungs.
The spinning momentum of the wheel does not stop when a limb gets caught. As the wheel continues to rotate under the weight of the animal’s body, the limb is wrenched against the support bars. This scissor effect leads to severe compound fractures, dislocated joints, ripped toenails, and traumatic tail amputations. Many small pets have lost entire toes or suffered broken leg bones simply because a foot slipped through a wire rung while running in the dark.

Replacing the Hazard: What a Safe Wheel Looks Like

No small animal should ever be forced to run on wire. Fortunately, providing a safe, enriching running experience does not require expensive, highly specialized equipment; it simply requires choosing products designed around proper biomechanics.
Solid running surfaces. The absolute golden rule of exercise wheels is an entirely solid, continuous running track. Look for wheels manufactured from thick, high-impact, chew-resistant plastic, smooth acrylic, or non-toxic sealed wood. A solid floor allows the animal’s footpads to make full, flat contact with the surface, distributing weight naturally and eliminating point pressure. There are no gaps for toes to slip through and no rough metal welds to scrape away skin.
Axle-free engineering. Modern wheel designs have largely phased out central crossbars. Choose a wheel that features a solid back wall and mounts directly to the cage wall or a heavy floor stand from the rear. Without an axle running through the running channel, the scissor effect is completely eliminated, making it impossible for a running pet to crush or sever a limb.
Proper diameter for spinal alignment. Wheel safety goes beyond surface texture; sizing matters immensely. When an animal runs in a wheel that is too small, their spine is forced into a continuous backward arch. Over months, this unnatural spinal curvature causes severe vertebrae compression, chronic lumbar pain, and compensatory gait changes that place abnormal pressure back onto the heel pads.
As a general guideline:
  • Mice and dwarf hamsters require a minimum wheel diameter of eight inches.
  • Syrian hamsters, gerbils, and small degus require a minimum diameter of ten to twelve inches.
  • Rats, hedgehogs, and chinchillas require large running wheels spanning twelve to fifteen inches, or spacious, solid flying-saucer treadmills.
When your pet is running at full stride, their back should remain entirely straight from the base of the skull to the tip of the tail.

Hygiene, Bedding, and Preventive Paw Care

Switching to a solid wheel eliminates the primary mechanical cause of bumblefoot, but maintaining healthy paws requires a holistic look at the entire cage environment.
Solid wheels need routine cleaning. Because waste does not fall through, urine and droppings will accumulate along the running track. Wipe down your pet’s solid wheel daily with a warm, damp cloth or a pet-safe, non-toxic enzymatic cleaner to keep bacteria counts near zero.
Substrate selection is equally important. Hard, abrasive bedding materials, such as cheap wood shavings, dusty sawdust, or crushed walnut shells, can cause localized skin irritation that mirrors the early stages of bumblefoot.
House your pets on deep, soft substrates such as virgin unbleached paper bedding, kiln-dried aspen shavings, or smooth, washable fleece liners. Soft bedding cushions feet when the pet lands from jumps and allows natural burrowing behaviors that keep footpads clean, dry, and well-aerated.
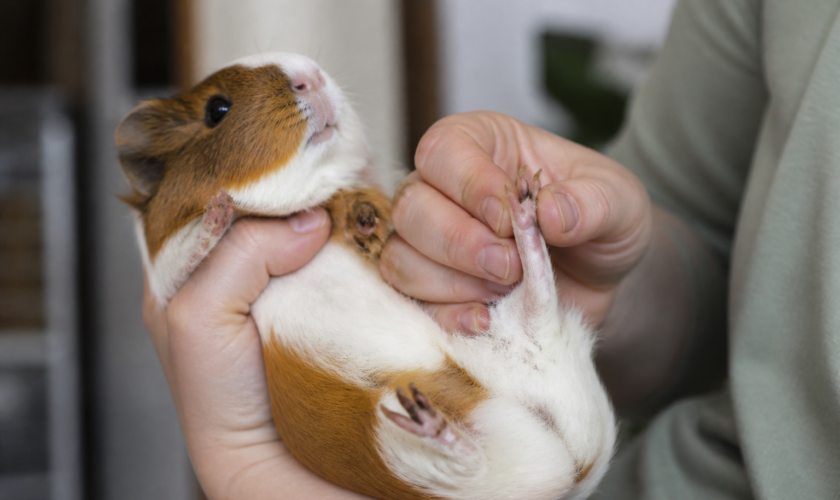
Make weekly paw checks a permanent part of your care routine. Gently cup your pet in your hand, turn them over in good lighting, and inspect the bottoms of all four paws. Look for:
  • Unusual redness or pale, hardened calluses.
  • Flaking, cracked skin or localized swelling.
  • Tiny scabs, dark spots, or dried discharge.
  • Resistance or squeaking when you gently touch the footpad.
Catching pododermatitis during the early redness stage allows you to resolve the problem simply by correcting the environment and applying soothing, vet-approved barrier balms. Once deep ulcers form, resolution requires professional veterinary care, prescription anti-inflammatory medications, systemic antibiotics, and daily antiseptic foot soaks.

Prioritizing Prevention Over Tradition

The enduring popularity of wire mesh wheels is a frustrating relic of outdated pet care standards. For decades, retail manufacturers prioritized cheap production costs and easy packaging over basic animal safety, normalizing equipment that poses an unacceptable threat to small pets.
Exercise should be a source of joy, mental enrichment, and vibrant health for your animals, not a pathway to chronic pain and crippling bacterial infections. By ditching the wire grates in favor of large, solid-surface, axle-free wheels, you remove one of the most dangerous hazards in companion animal care. Your pet gets to log their nightly miles in total safety, and you get to enjoy the quiet hum of their wheel with complete peace of mind.
read more
Pet Care

Saving Your Sofa: Redirecting a Cat That Scratches Leather Furniture

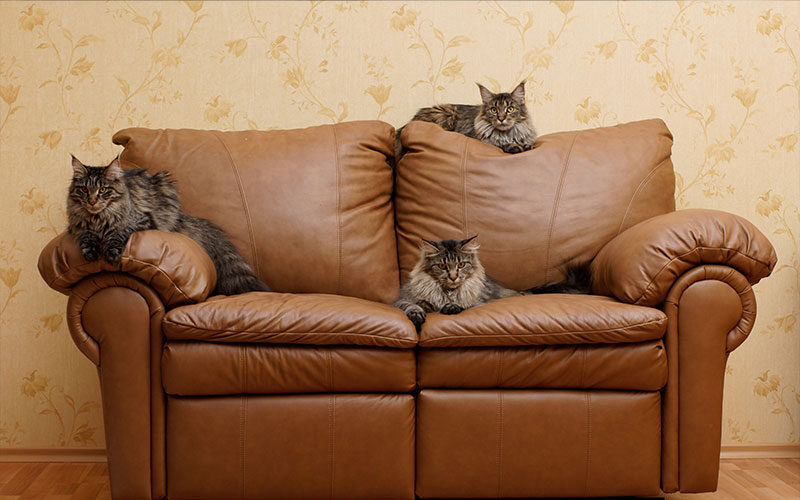
Few household sounds produce a sudden spike of adrenaline quite like the rhythmic, hollow crunch of cat claws sinking into supple leather. You dash into the living room only to find your cat fully extended, hind legs braced against the rug, methodically perforating the rolled arm of an expensive leather sofa. A split second of human hesitation leaves behind a cluster of pale, jagged punctures that no amount of leather conditioner can erase.
Leather furniture represents a substantial investment, which makes feline vandalism feel particularly personal. The instinctual human response is often loud and emotional: a startled shout, a clap of the hands, or an exasperated lunge across the room with a spray bottle. Yet reacting with anger or panic accomplishes nothing. To your cat, that sofa corner is not a luxury centerpiece or an heirloom investment. It is an exquisitely placed, structurally sound scratching station that fulfills non-negotiable biological and communication drives.
Protecting your leather does not mean banishing your cat from common areas or resigning yourself to shredded upholstery hidden under bedsheets. Saving your sofa requires understanding the mechanics of feline clawing, providing replacement surfaces that rival the appeal of leather, and systematically reshaping your cat’s territorial habits.

The Feline Perspective: Why Leather Attracts Claws

Scratching is often misunderstood as destructive mischief or a simple grooming routine. While removing old nail husks is part of the equation, the behavior is far more complex, combining physical conditioning, stress regulation, and sophisticated scent communication.

Territorial Billboards and Scent Marking

Cats are intensely visual and chemical communicators. Tucked between the pads of their paws are interdigital glands that secrete unique pheromones. When a cat drags their claws down a surface, they leave behind two distinct territorial messages at once: a bold visual gouge that screams occupancy to any passing animal, and a chemical signature that reinforces their sense of security within the territory.
Furniture placed in high-traffic communal zones, such as the living room sofa, naturally becomes a target. The living room carries the strongest concentration of your scent, alongside the scents of visitors, other pets, and outdoor stimuli drifting through windows. By scratching the primary furniture pieces in this shared space, your cat is effectively co-signing the lease. They are blending their scent profile with yours to create a comforting communal scent boundary.

Somatic Stretching and Keratin Shedding

A cat’s claws grow in continuous layers, similar to an onion. As fresh keratin forms underneath, the dull, brittle outer sheath must be sloughed away to reveal a razor-sharp point. Scratching provides the mechanical friction necessary to peel away these dead sheaths.
Simultaneously, the physical act of scratching serves as an essential somatic exercise. Cats anchor their front claws deeply into a stable substrate so they can pull backward against their own weight. This action extends their spine, releases tension throughout the shoulders and upper back, and keeps the flexor tendons of their paws conditioned for balance and agility.

The Specific Tactile Allure of Leather

Woven fabrics provide threads that catch and pull, which many cats love. Leather, however, offers an entirely different tactile feedback loop. It is smooth, slightly cool, and stretched taut over firm wooden frames and dense foam padding.
When a cat tests leather, their claws sink into the material with minimal resistance before meeting the firm underlying cushion. There are no loose threads to snag a toe, and the puncture creates a distinct, satisfying pop. Moreover, real leather retains natural animal oils and aromas that pique a predator’s curiosity. Once a cat realizes that a leather sofa corner does not wobble or tip when pulled with full body weight, that piece of furniture becomes prime real estate.

Choosing the Right Alternatives: The Match-and-Upgrade Strategy

The most common mistake owners make when attempting to redirect a cat is buying a flimsy, carpet-covered post from a supermarket and sticking it in a quiet corner of the house. That post will sit ignored while the leather sofa continues to take the beating.
To win your cat away from leather, your alternative scratching posts must match the structural integrity and spatial importance of the sofa, while offering superior tactile satisfaction.

Prioritize Height and Unshakable Stability

Watch your cat scratch the sofa. Notice how they extend their spine to full length, stretching their front legs as high as possible while planting their rear feet firmly on the floor.
If you provide a replacement post that is only eighteen inches tall, your cat cannot achieve that full-body extension. If the post has a narrow, lightweight base that wobbles or tips when twenty pounds of kinetic force pulls against it, the cat will immediately abandon it for the immovable stability of the sofa.
Choose a vertical post that stands at least thirty to thirty-six inches tall with a wide, heavy wooden base. The post must remain rigid under significant lateral tension. If you push the top of the post with your finger and it rocks, add a flat cast-iron plate beneath the base or secure it to a wall.

Select Superior Textures Over Carpet

Many commercial cat trees are wrapped in standard loop carpet. This is problematic for two reasons: the carpet fibers easily snag claw sheaths, causing pain, and it teaches your cat that home textiles are appropriate scratching surfaces.
Instead, provide materials that offer clean, satisfying resistance:
  • Woven Sisal Fabric: Far superior to wound sisal rope. Woven sisal cloth allows claws to slide through the weave without catching, delivering a smooth, shreddable pull that mimics tree bark.
  • Real Wood Logs or Cedar Posts: Some cats that target leather crave the natural, unyielding density of natural wood. A debarked cedar post or untreated split log brings an outdoor tactile experience inside.
  • Dense Corrugated Cardboard: High-density, multi-layer cardboard provides a crisp, crunching feedback loop under the claws that many cats find even more addictive than leather.

Strategic Placement: The Micro-Location Principle

Location is frequently the deciding factor between a used scratcher and a neglected one. In the cat world, a scratcher placed in a spare bedroom or hidden behind a bookshelf does not exist. The mark must be visible in the social hub of the home.
Place your new, heavy-duty scratching post directly in front of the specific sofa corner your cat currently targets. The post should physically block their approach to the damaged leather. If your cat has to squeeze past a towering, ultra-stable sisal post to touch the leather, the sisal post will intercept their visual and physical path.
Leave the post directly against the sofa for several weeks. Once your cat is using the new post exclusively, you can begin moving it away if desired. However, you must move it incrementally: no more than three to four inches per day. If you move it across the room in a single afternoon, your cat will simply default back to the nearest immovable vertical surface: your sofa.

Shielding the Leather Without Causing Ruin

While you establish alternative habits, you must remove the sofa’s tactile reward. If your cat can still plunge their claws into the leather whenever you leave the room, the variable reinforcement cycle continues.
Protecting leather requires extra care because adhesives, tape residues, and chemical sprays can strip delicate leather finishes and cause permanent discoloration.

Rigid Acrylic Guard Panels

The most effective, leather-safe physical barrier is a set of clear, rigid acrylic furniture shields. Unlike adhesive vinyl sheets that peel away the leather’s protective topcoat upon removal, rigid acrylic shields can be hung or slipped under the sofa cushions without touching the leather with glue.
The smooth, hard surface of acrylic provides zero traction for claws. When your cat approaches to scratch, their paws slide down the slick surface without puncturing anything. Robbed of the tactile purchase they crave, cats quickly lose interest in that specific access point.

Temporary Drape Barriers

If rigid guards are not an option for your furniture’s shape, drape heavy, slick blankets or tightly woven quilted moving pads over the vulnerable arms and corners. Tuck the fabric deeply into the cushion crevices to keep it taut. A thick canvas drop cloth or a heavy throw blanket prevents claws from reaching the leather beneath while changing the texture of the corner into something far less appealing.

Scent-Based Deterrents (Applied Responsibly)

Cats possess an extraordinary olfactory sense and naturally dislike intense citrus, rosemary, and eucalyptus scents. However, you must never spray essential oils or acidic citrus liquids directly onto genuine leather; the acids and oils can stain, dry out, or degrade the hide.
Instead, spray a diluted citrus or botanical deterrent onto clean cotton washcloths or ribbon strips, allow them to air-dry slightly until they are damp rather than soaking wet, and pin or drape those cloths across the sofa corners. The aroma will create a perimeter scent barrier that repels the cat’s sensitive nose without exposing the leather grain to moisture damage.

Rewiring the Routine: Positive Reinforcement and Maintenance

Deterrents only solve half the equation. To build permanent domestic peace, you must make using the proper scratching station the most rewarding part of your cat’s daily routine.

Catching the Good Behavior

Never carry your cat to a new scratching post and manually drag their paws down the sisal. Cats dislike having their limbs manipulated, and forcing the motion creates negative friction with the object you want them to love.
Instead, make the post naturally enticing. Rub high-grade catnip or silvervine powder into the woven fibers of the post, or trail a feather wand up the side of the sisal column so your cat sinks their claws into the material during play.
Keep a jar of premium, meat-based treats near the sofa. Whenever you notice your cat approach the post and begin scratching, remain calm and quiet. Wait until they finish their stretch, then immediately offer verbal praise and deliver a high-value treat right at the base of the post. With consistent repetition, your cat learns that interacting with the post yields a direct culinary reward, whereas approaching the shielded leather yields nothing.

Routine Claw Trimming

A disciplined claw-care schedule dramatically lowers the stakes while your training takes hold. An untrimmed claw functions like a curved needle, penetrating leather on the slightest contact. A freshly blunted claw, by contrast, slides off leather surfaces with minimal damage.
Trim your cat’s front claws every ten to fourteen days. Use a dedicated, sharp scissor-style pet nail trimmer:
  1. Handle your cat’s paws during calm, sleepy moments, offering treats for simply allowing their toes to be gently squeezed.
  2. Press gently on the center pad to extend the claw outward.
  3. Locate the pink triangle inside the nail known as the quick, which contains blood vessels and nerves.
  4. Snip only the clear, hooked tip of the claw, staying several millimeters away from the pink tissue.
If your cat resists full sessions, do not force the issue. Trim two or three nails while they nap, reward them, and finish the remaining paws later in the day. Keeping the tips blunt ensures that an accidental jump or brief investigative tap will not leave an indelible mark on your leather.

Addressing Existing Leather Damage

Once your cat has transitioned to their designated posts, you can assess the salvageability of the furniture. Small, clean puncture marks from blunted claws can often be improved significantly at home:
Use a high-grade leather conditioner and recoloring balm matched to your furniture’s dye lot. Massaging rich conditioner into the puncture zones softens the stretched edges of the leather fibers, allowing the holes to contract and visually blend into the natural grain.
For deep tears or shredded corners where the fibrous suede layer beneath has been exposed, avoid messy do-it-yourself glues that cure into hard, sharp lumps. Contact a mobile leather restoration specialist. Professional technicians can apply sub-patches, sand frayed leather fibers flat, inject flexible water-based binders, and airbrush custom-matched color pigments, restoring the structural integrity of your sofa arm so effectively that the previous damage becomes virtually undetectable.

The Long-Term Balance

Living happily with cats does not require sacrificing an eye for interior design or settling for battered furniture. It simply demands that we stop viewing scratching as an act of defiance and start managing it as the biological necessity it is.
When you install sturdy, well-textured posts in the rooms where your family actually spends time, shield vulnerable corners with slick barriers, and keep claws neatly maintained, the conflict evaporates. Your cat retains their essential outlets for marking, stretching, and conditioning their body, while your leather sofa remains the pristine, elegant centerpiece of your living room for years to come.
read more
Pet

Helping Kids Cope: Navigating the Short Lifespans of Rodent Pets

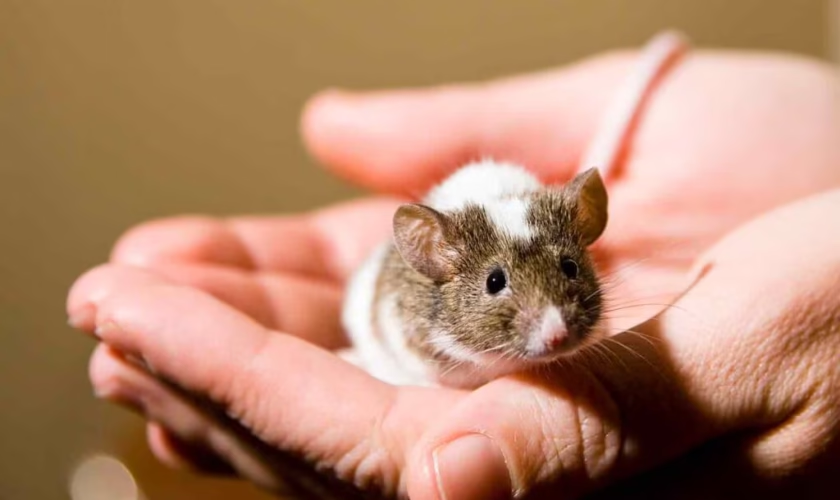
The purchase often begins with the best of intentions. A family strolls into a pet store or rescue shelter looking for a child’s very first companion. Dogs feel too demanding for a packed school schedule, and cats might trigger allergies, but a Syrian hamster, a pair of fancy rats, or a duo of energetic gerbils seems like the perfect compromise. Parents envision easy lessons in responsibility: filling water bottles, scooping bedding on Saturday mornings, and offering apple slices through cage bars.
What many parents fail to anticipate is the emotional collision course built into the biology of small mammals. Rodents carry an extraordinary capacity for personality. A pet rat will learn its name, ride happily on a child’s shoulder while they do homework, and eagerly groom small fingers. A hamster will develop intricate evening burrowing routines that fascinate a seven-year-old for hours.
Then, scarcely two or three years later, that intense bond runs headfirst into a harsh reality. Small rodents live fast, burn bright, and age with startling speed. For millions of children, a tiny cardboard shoebox buried beneath an oak tree becomes their very first encounter with mortality.
Navigating this compressed lifecycle requires parents to abandon the dismissive myth of the disposable starter pet. When handled with candor, emotional safety, and thoughtful ritual, the brief life of a rodent companion offers children an invaluable developmental blueprint for processing grief, understanding empathy, and learning how to love deeply despite the certainty of loss.

The Starter Pet Myth and the Reality of Fast Mortality

Society frequently diminishes small companion animals. Phrases like “it is just a hamster” or “you can buy another mouse for ten dollars” treat these animals as educational training wheels rather than living creatures with genuine emotional value.
To a young child, physical size has zero correlation with emotional significance. A child does not love an eighty-pound golden retriever eight times more than a ten-ounce hooded rat. In fact, small pets often occupy an even more intimate space in a child’s everyday world. They live directly inside the bedroom. They are the silent confidants who hear bedtime secrets, witness quiet tears after a hard day at school, and provide soothing tactile feedback through their soft fur.
The biological reality is unyielding:
  • Fancy mice typically live between one and two years.
  • Hamsters rarely surpass two to three years, often showing marked physical decline shortly after their second birthday.
  • Fancy rats, despite possessing the social intelligence, affection, and trainability of miniature canines, carry a devastatingly brief window of two to three years, frequently marred by high rates of respiratory illness and tumors.
  • Gerbils fare slightly better, generally living three to four years, while guinea pigs (which are cavies, rather than true rodents in the popular sense) offer a longer window of five to eight years.
Because their biological clocks tick so rapidly, a rodent can transition from prime youth to elderly fragility within six months. When parents understand this timeline, they can shift their perspective from surprised devastation to proactive stewardship.

Laying the Groundwork: Honesty Before the Loss Occurs

The best time to prepare a child for the loss of a pet is not when the animal is taking its final ragged breaths in a nest of paper shavings. Preparation begins the day the animal enters the home.
Framing the conversation early removes the element of betrayal when aging begins. You do not need to deliver a grim lecture to an excited child holding a new pet; rather, weave lifespan awareness naturally into discussions about biology and care.
Explain that different animals experience time in different rhythms. A tortoise moves slowly and can live for a century, while a little mouse lives life on fast-forward: its heart beats hundreds of times a minute, its little legs run miles every night, and its entire lifespan is packed into a few meaningful years.
By framing a short lifespan as a natural characteristic of the species rather than an unfair tragedy, you instill a sense of urgency around daily kindness. Teach your child that because our time with small friends is brief, every fresh handful of greens, clean cage, and gentle handling session matters immensely.

The Peril of Well-Intentioned Deception

When a small pet dies suddenly, the instinct of many loving parents is protection through evasion. The desire to shield a child from sobbing heartbreak is completely understandable, but resorting to deception almost always backfires.

The “Pet Store Switcheroo”

One of the most persistent tropes in suburban parenting is quietly rushing to the pet shop while the child is at school, buying an identical golden hamster, placing it in the cage, and pretending nothing happened.
Children are far more observant than adults give them credit for. They notice subtle differences in coat patterns, physical temperament, handling tolerance, and nighttime habits. When the “resurrected” pet acts terrified of their hands or runs differently on its wheel, the child is left confused, second-guessing their own senses, and feeling an unspoken wrongness in their environment.
More critically, replacing a pet without acknowledgment robs the child of their right to mourn. It silently reinforces the harmful idea that living beings are interchangeable appliances that can be reordered when broken. When the truth inevitably slips out years later, it shatters parental credibility on topics far more serious than pet care.

The Problem with Euphemisms

Language matters profoundly when discussing death with young minds. Adults naturally reach for soft euphemisms to cushion the blow, telling children that the pet “went to sleep,” “passed away,” or “went to live on a farm.”
For young children, especially those under the age of eight, abstract language breeds anxiety rather than comfort:
  • Telling a child a pet “went to sleep and did not wake up” can induce severe bedtime terrors. Children begin worrying that if they fall into a deep sleep, they or their parents might not wake up either.
  • Claiming the pet “got lost” or “went on a trip” instills chronic guilt. The child wonders why their pet abandoned them, whether they left the cage latch loose, and spends months watching the doorway in vain hope.
  • Explaining that “God needed another angel” or that the animal was “taken because it was so special” can foster resentment toward spirituality or cause fear that other good people in their life will be chosen next.
Use clear, gentle, biologically accurate phrasing. Explain that the pet’s body stopped working: “His heart stopped beating, he cannot feel any pain, he does not breathe anymore, and he cannot wake up.” It sounds blunt to adult ears, but to a concrete-thinking child, clear physiological facts provide a stable, understandable boundary that prevents frightening imaginative spirals.

Navigating the Final Days: Comfort Care and Euthanasia

Unlike dogs, who often display obvious mobility loss, a rodent’s decline can be subtle until it becomes acute. Prey species possess a hardwired instinct to hide weakness until their physiological reserves are completely spent.
When an elderly rodent begins to fail—losing muscle mass along the spine, sleeping outside their usual hide box, struggling to crack hard seeds, or developing chronic respiratory clicking—involve your child in compassionate hospice care.
Change the focus of ownership from play to comfort:
  • Lower water bottle nozzles and move food dishes directly next to their sleeping nest.
  • Replace standard wood shavings with ultra-soft paper bedding or fleece to cushion aching joints.
  • Allow the child to prepare soft, nourishing elder-care meals: warm baby food, pureed pumpkin, scrambled eggs, or oatmeal.
Involving children in palliative care teaches them that love is not merely about playing when an animal is fun and lively; it is about providing dignity, warmth, and gentle protection when an animal is old and vulnerable.
If the animal reaches a point of intractable suffering—common with mammary tumors in rats or wet tail in hamsters—the conversation must shift to veterinary euthanasia. Frame this decision not as giving up, but as the final, bravest act of friendship. Explain that humans have a special responsibility to step in and prevent pain when a small body is too tired to continue on its own.
Whether a child attends the veterinary procedure depends heavily on their age and temperament, but they should always be given agency in the decision. If they choose not to be present in the exam room, they can still write a letter to slip into the transport carrier or wrap their friend in a favorite scrap of fabric for the journey.

Supporting Children Across Developmental Stages

Children understand the permanence and mechanics of death differently depending on their cognitive maturity. Tailoring your support to their specific developmental phase prevents miscommunication.

Toddlers and Preschoolers (Ages 3 to 5)

Children in this age bracket view death as temporary and reversible, much like a cartoon character flattened by an anvil who pops back up in the next scene.
Do not be surprised if a four-year-old cries hysterically upon hearing the news, asks to go play with blocks three minutes later, and then asks when the hamster is waking up for dinner that evening. This is not heartlessness; their brains simply cannot hold the concept of forever.
Respond with patient, repetitive clarity. Reiterate that the pet has died, its body does not work anymore, and it will not come back, but that it is okay to feel sad or miss them whenever those feelings pop up.

Early Elementary (Ages 6 to 9)

At this stage, children begin to understand that death is permanent and universal, though they often attach magical thinking to the event. They may worry that an accidental drop three months ago caused the illness, or that they did not clean the water bottle thoroughly enough.
Address unspoken guilt proactively. Reassure them explicitly: “You took wonderful care of her. Her body grew old because that is how mice are made, and nothing you did caused this to happen.”
Children in this bracket often ask detailed biological questions: “What happens to his body in the ground? Does he get cold? Can he breathe under the dirt?” Answer these questions with matter-of-fact science rather than horror. Explain natural decomposition as the Earth’s way of recycling energy back into soil and plants.

Pre-Teens and Adolescents (Ages 10 and Up)

Older kids grasp mortality fully and often feel the loss with adult-level intensity, compounded by teenage self-consciousness. They may attempt to bottle their grief up, embarrassed to weep openly over a creature their peers might mock as a sewer pest or snake food.
Validate the magnitude of their pain without patronizing them. Let them know that mourning a rat or gerbil is completely legitimate. Give them space to process quietly, but check in consistently. Often, the death of a childhood pet triggers deeper existential anxieties about growing up, the passage of time, and the aging of human grandparents or parents.

Practical Healing: Meaningful Memorials and Rituals

Closure requires physical action. Because small animals are rarely handled by traditional funeral homes, families have complete freedom to craft personal, hands-on farewell rituals that allow children to process their grief tangibly.
The backyard burial. If local municipal ordinances allow, hold a brief, dignified burial service in the yard. Let the child decorate the cardboard box with markers, personal notes, drawings, or dried flowers. Place a small sprig of parsley or a sunflower seed inside with the pet as a symbolic send-off.
Living memorials. Plant a perennial flowering bush, a small tree, or a cluster of bulbs over the burial site or inside a patio container. As green shoots emerge each spring, children see a direct, comforting visual representation of life continuing forward.
The memory stone. Purchase a smooth river rock or an inexpensive stepping-stone kit. Allow the child to paint the pet’s name, paw prints, or colors onto the stone to create a permanent monument they can place in the garden or keep on their bedroom bookshelf.
Preserving artifacts. Clean their favorite ceramic hideout, wooden chew toy, or running wheel and keep it in a small memory box alongside favorite photographs.
Avoid rushing out to acquire a replacement pet immediately. Welcoming a new animal within forty-eight hours sends the message that the previous life held little distinct value. Allow the house to sit with the quiet emptiness of the clean cage for several weeks or months. Only when the child can recall the pet’s memory with fond laughter rather than fresh tears should the family discuss whether they have the emotional space to open their hearts to another tiny companion.

The Lasting Gift of a Brief Life

It is an uncomfortable paradox: the very trait that makes small rodents difficult pets—their painfully short lifespans—is precisely what makes them profound teachers.
In an increasingly sanitized world where discussions of aging and mortality are swept behind institutional doors, caring for a small mammal offers children an unvarnished, authentic encounter with the natural cycle of life. They learn that life does not need to span eighty years to be complete, joyful, and deeply worthy of love.
When you stand alongside your child, validating their tears over a tiny bundle of fur wrapped in a paper towel, you are giving them far more than comfort in a moment of distress. You are building their emotional resilience, teaching them that sorrow is the honorable price we pay for devotion, and assuring them that even the smallest lives leave an indelible footprint on our hearts.
read more
Trainer

Winter Potty Training: How to Get a Stubborn Puppy to Pee in the Snow

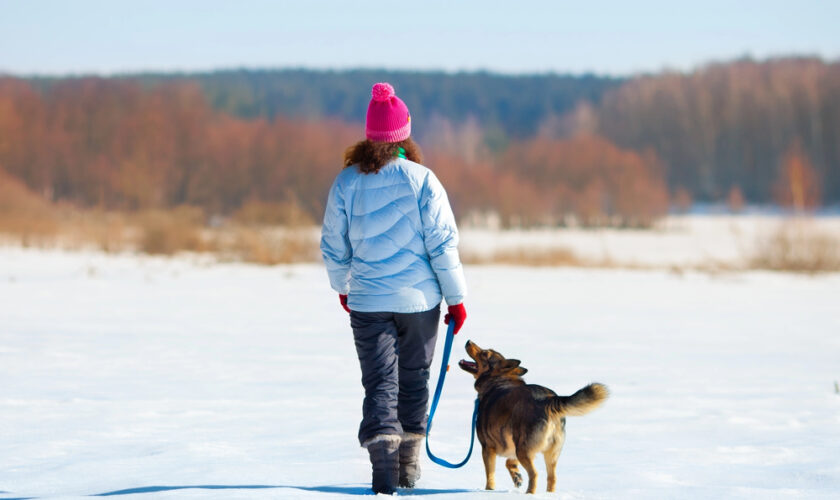
Stepping out into a biting January wind at six in the morning is miserable enough on its own. It becomes an exercise in pure exasperation when you are standing in a snowbank in your slippers, pleading with an eight-pound puppy who has anchored all four paws to the welcome mat and refuses to budge. You wait ten freezing minutes while your puppy shivers violently, stares at you with absolute betrayal, and accomplishes nothing. The moment you give up and step back into the warm house, your puppy trots straight to the living room rug and relieves themselves without hesitation.
Winter potty training is notorious among dog owners for a reason. While spring and summer litters have the luxury of soft green grass, warm sunshine, and leisurely outdoor exploration, winter puppies face an uphill battle against the elements. When a young dog balks at snow, they are rarely acting out of spite or stubbornness. To a puppy, winter represents acute sensory shock, physical discomfort, and genuine instinctual vulnerability.
Transforming those icy standoffs into swift, reliable outdoor bathroom breaks requires shifting your approach from patience alone to structured preparation, physical protection, and targeted incentives.

Understanding the Winter Resistance: Why Puppies Balk at Snow

Before you can fix the behavior, you have to understand what happens to a young dog when they encounter freezing weather. Puppies possess minimal body fat, thin coats, and bellies that sit just inches above the ground. Plunging into a drift of snow is the human equivalent of wading naked through an ice bath.

The Physical Reflex of Cold Ground

Urination and defecation require a dog to relax specific muscle groups. When sub-zero temperatures hit a puppy’s bare paws and icy slush splashes against their underside, their nervous system triggers an involuntary physical reaction: muscles contract, the body shivers to generate heat, and the posture tightens. The physiological relaxation necessary to eliminate becomes nearly impossible while the puppy is locked in a full-body clench.

Disappearing Scent Markers

Canine elimination is heavily scent-driven. Dogs rely on lingering scent cues from previous outings, soil, and decomposing vegetation to trigger the urge to go. A fresh blanket of snow seals away those familiar odors under several inches of frozen insulation. For a young dog whose routine is still fragile, an odorless white blanket looks, feels, and smells like an entirely foreign environment where they do not yet know how to behave.

Sensory Overload and Fear

Snow transforms the acoustics and visuals of your yard. Familiar objects disappear, sounds are muffled, and wind creates sudden, alarming gusts. Depending on your puppy’s temperament, deep snow either triggers intense panic or sudden, frantic overstimulation. Some pups freeze in place out of fear, while others turn into manic snow-plows, biting at snowflakes and tunneling through drifts, completely forgetting the biological urge that brought them outdoors in the first place.

Preparing the Yard: Creating a Winter Elimination Zone

Expecting a tiny puppy to trudge through deep snow to find a spot on their own is setting them up to fail. Your first job as a winter puppy parent is physical landscaping.
Shovel down to the bare earth. Clear a wide pathway from your exit door leading directly to a dedicated relief station. Shovel out a flat square roughly four feet by four feet, clearing away the snow completely until you reach frozen grass, dirt, or pavement. This provides your puppy with stable, flat footing where cold snow is not actively pressing into their belly or tail.
Choose a sheltered perimeter. Wind chill is often a greater deterrent than ground temperature. Establish your puppy’s winter relief area in the most sheltered corner of your property, such as against a tall privacy fence, alongside an exterior brick wall, or behind an evergreen windbreak. Blocking the direct sweep of freezing wind keeps your puppy focused and prevents panic.
Insulate the ground surface. Frozen ground leeches warmth from small paw pads within seconds. To make the cleared area inviting, spread an insulating layer over the bare dirt or ice. A light layer of clean straw, untreated wood shavings, or even a spare piece of artificial turf provides thermal separation between your pup’s feet and the frozen earth. The familiar texture of straw or turf also helps reactivate their elimination instincts.

Equipping Your Puppy for Sub-Zero Trips

Proper winter gear is not about vanity or dressing up your pet; it is functional equipment that keeps their nervous system calm enough to do business.

Core Warmth

A small, single-coated, or short-legged puppy loses body heat rapidly. Invest in a well-fitted, fleece-lined jacket or sweater that wraps snugly around the chest and torso. The jacket must have a high-cut belly line so that it stays dry when the puppy squats or lifts a leg. Wet fabric against bare skin accelerates chilling and will make the next outdoor trip twice as difficult. Put the coat on your puppy a minute or two before opening the door so their core is already warm when the cold air hits.

Paw Protection and Salt Safety

Snow easily packs between delicate toes, forming hard ice balls that stretch the paw pads and cause sharp pain. Furthermore, urban and suburban sidewalks are often coated in chemical de-icers and coarse rock salt that can burn tender footpads.
  • Apply a dense, food-grade paw protection wax to your puppy’s pads before heading out. Wax creates a semi-permeable shield that repels moisture, stops snowballs from sticking to paw hair, and protects against drying salt.
  • If your puppy tolerates footwear, lightweight rubber booties offer complete moisture protection. However, do not introduce booties for the first time during an urgent potty break. Practice wearing them indoors with treats first so your puppy does not freeze in place trying to kick them off in the yard.
  • Keep a clean, damp towel by the entryway. The second you step inside, wipe down your puppy’s paws to remove snow, road salt, and dirt. This prevents stinging and ensures they do not ingest toxic chemical melts by licking their paws clean.

The Winter Potty Protocol: Step by Step

Consistency is the backbone of housebreaking, but winter demands speed and precision. Lengthy, casual sniff-walks are counterproductive in freezing weather.

1. Carry, Do Not Walk

When taking a puppy out in deep winter, pick them up and carry them through the doorway and straight to their designated shoveled relief patch. If you allow a small puppy to walk the whole way, they will waste their brief threshold of tolerance stumbling through drifts, shivering, or trying to turn back toward the warm house. Placing them directly into the target zone conserves their energy and immediately frames the purpose of the trip.

2. Keep Them on a Short Leash

Never let a winter puppy loose in the yard to roam freely. An off-leash puppy will either sprint back to the door or get lost in snowdrifts and lose focus. A standard four-to-six-foot leash keeps your pup centered on the shoveled patch, restricts wandering, and establishes that outdoor trips are purely business. Stand calmly in the center of the patch and let the puppy move in a small circle around you.

3. The Strict Four-Minute Window

Set a strict timer in your head: three to four minutes maximum. If your puppy has not gone within that window, keeping them outside longer will only cause escalating misery and negative associations with cold weather.
If they do not go, calmly pick them up and bring them inside. Do not grant them immediate house freedom. Place them directly into their crate, a playpen, or tether them to your waist via an umbilical leash for ten to fifteen minutes. During this holding period, their bladder remains full, but supervision prevents an accident. Once the holding period is up, carry them straight back out to the cleared patch and try again. Repeat this cycle until they eliminate outside.

4. Deploy High-Value Jackpot Rewards

Standard kibble is rarely enticing enough to overcome the discomfort of freezing temperatures. When training in winter, you must bring out top-tier incentives. Keep moist, aromatic, high-protein treats in a coat pocket where your body heat keeps them warm and fragrant. Small slivers of plain roast chicken, freeze-dried liver, or hot dog work exceptionally well.
The exact second your puppy finishes eliminating, deliver enthusiastic praise and a succession of three to four high-value treats directly to their mouth. Deliver the reward while your puppy is still standing in the snow. If you wait until you walk back inside, your puppy will associate the treat with entering the house rather than relieving themselves in the cold.

Handling Extreme Weather and Common Setbacks

Even the most dedicated training plan runs into complications when severe winter storms, blizzards, or sub-zero polar vortexes arrive.

Navigating Hazardous Wind Chills

When temperatures drop into single digits or sub-zero wind chills, young puppies face a real risk of hypothermia and frostbite within minutes. During severe winter weather advisories, prioritize safety over outdoor perfection.
Set up a temporary indoor transition station in an unheated porch, attached garage, or utility room. Lay down a plastic tarp topped with a tray of fresh sod or clean straw. This keeps the sensory experience of natural substrate intact without exposing a vulnerable puppy to life-threatening wind chills. Once the severe cold front breaks, transition immediately back to your outdoor shoveled zone.

Breaking the Indoor Relief Habit

If your puppy develops a habit of immediately peeing on the rug after coming inside, you are likely leaving the outdoor zone too quickly or missing subtle pre-potty signals. When you return inside after an unsuccessful attempt, do not set the puppy down on carpeting or rugs. Hold them or keep them on a non-porous floor like tile or laminate where you can watch their body language. The moment they drop their tail, circle, or sniff intently, scoop them up mid-motion with a cheerful interruption and head back outside.
Clean every indoor accident thoroughly with a dedicated enzymatic cleaner. Standard household detergents remove visible stains but leave behind microscopic uric acid salts that signal to your puppy that the carpet is an approved indoor bathroom.

Raising a Weatherproof Companion

Winter housebreaking tests the stamina of every dog owner. It requires shivering through dark mornings, shoveling snow paths at midnight, and maintaining discipline when curling up under a warm blanket sounds far more appealing.
Yet there is a distinct silver lining to winter litters. Dogs raised to potty reliably in snow, ice, and biting winds rarely develop the weather sensitivity that plagues dogs raised in mild climates. By protecting your puppy’s physical comfort, clearing their path, and making success unmistakably rewarding, you teach them that winter is manageable. With a week or two of clear, structured execution, your puppy will learn to step outside, finish their business promptly, and trot back inside to the warmth with pride.
read more
DogTrainer

The Counter-Surfing Cure: Training Your Dog to Ignore Kitchen Prep

You turn your back for four seconds to grab the olive oil from the pantry, and the trimmed chicken breast resting on your cutting board vanishes. In its place stands an eighty-pound retriever licking his chops, looking up with an expression of pure, unbothered innocence. Or perhaps your dog is smaller, launching onto their hind legs like a spring-loaded jack-in-the-box the moment a package of cheese crinkles.
Counter-surfing is one of the most maddening habits a pet parent can deal with. It turns weeknight meal preparation into an exhausting game of defensive culinary hockey. You chop onions with one hand while physically blocking the kitchen perimeter with your hip, constantly bracing for the next raid. Worse still, it is dangerous. Between sharp kitchen knives, smoking cast iron skillets, and toxic ingredients like onions, garlic, and chocolate, a dog with vertical ambitions can cause serious harm to themselves in an instant.
Yelling “Off!” after the fact rarely does a thing. Banishing this habit permanently requires understanding the canine brain, eliminating accidental rewards, and teaching an alternative behavior so reliable that your dog chooses their own bed over your kitchen island.

The Anatomy of Counter-Surfing: Why Scolding Fails

Most dog owners tackle counter-surfing with verbal reprimands. You catch your dog with two paws on the granite, clap your hands, shout “No,” and push them off. To a human, that interaction communicates disapproval. To a dog, you have just engaged in a thrilling game of physical tag, or at the very least, rewarded them with direct eye contact and vocal attention.
To fix this behavior, you have to look at the kitchen through the eyes of an opportunistic scavenger.

The Power of Intermittent Reinforcement

In the dog world, counter-surfing is the canine equivalent of a Las Vegas slot machine. A dog might jump up twenty times and find nothing more than a clean sponge or a dry dish towel. But on the twenty-first jump, they hit the jackpot: an unattended stick of butter or a slice of warm sourdough bread.
In behavioral psychology, this is known as a variable schedule of reinforcement. When a behavior produces an unpredictable, high-value payout, that behavior becomes extraordinarily resistant to extinction. Your dog does not care that they struck out twenty times yesterday. They will happily jump thirty times today because the memory of that one stick of butter never fades.

The Flaw of Delayed Correction

Dogs operate strictly in cause-and-effect windows measured in split seconds. If your dog grabs a strip of bacon off the counter, eats it, and you yell at them four seconds later as they swallow, the correction is functionally useless. In your mind, you are punishing the theft. In the dog’s mind, they were rewarded with delicious pork, and now their human is acting erratic for no apparent reason. The food has already reinforced the jump, rendering any subsequent scolding entirely meaningless.

Phase One: Bulletproof Environmental Management

You cannot train a dog out of a self-rewarding behavior while continuing to give them opportunities to practice it. Every single time your dog succeeds in swiping a crumb from the counter, your training resets to zero. Before you pick up a clicker or a treat pouch, you must enforce total environmental lockdown.
The clear-counter standard. Kitchen surfaces must be kept entirely barren when not in active use. This means no cooling cookies sitting under plastic wrap, no butter dishes on the island, and no bread bags left on the perimeter. If food must thaw, thaw it inside the microwave, the refrigerator, or an upper cabinet. Wipe down counters immediately after cooking to remove aromatic cooking grease that encourages scent-driven investigations.
Physical barriers. During the initial weeks of training, your dog should not have unmonitored access to the kitchen. Use freestanding baby gates, tension gates, or closed pocket doors to block entryways. If you have an open-concept floor plan that resists gating, use a designated exercise pen or keep your dog tethered to your waist on a hands-free leash when you are not actively working on training drills.
Management is not a cop-out; it is the scaffolding that allows new habits to take root. If your dog cannot physically reach the counters, they stop checking the counters.

Teaching the Incompatible Behavior: The “Place” Command

You cannot simply tell a dog what not to do. Nature abhors an instructional vacuum. If you take away counter-surfing, you must provide a concrete, highly rewarded job to replace it. The most effective antidote to kitchen chaos is teaching a rock-solid place command.
The premise is straightforward: your dog cannot have their paws on the kitchen counter if their entire body is lying flat on an orthopedic dog bed across the room.

Selecting and Positioning the Station

Choose a dedicated mat, cot, or flat dog bed with clear visual and physical edges. Raised elevated beds work exceptionally well because the physical drop-off at the edge gives the dog clear tactile feedback about their boundaries.
Position this bed outside the immediate kitchen footprint, but keep it within the dog’s line of sight. Dogs surf counters partly for food, but also partly because the kitchen is the operational hub of the house. If you banish your dog to a distant laundry room, they will fight to rejoin the action. Placing their mat six to ten feet away allows them to watch the dinner theater without being in your way.

Building Duration and Value

Do not expect your dog to hold this position while you roast a Thanksgiving turkey on day one. You must build duration gradually, away from mealtime distractions.
Lure your dog onto the bed, cue “Place,” and mark the exact moment all four paws settle on the fabric with a crisp verbal marker like “Yes” or a clicker. Immediately deliver a high-value treat between their front paws.
Keep your treat delivery low to the surface of the mat; you want the mat itself to feel like a magnet. Release them with a cheerful break word like “Free” and toss a piece of kibble away from the bed.
Gradually stretch the duration: five seconds, ten seconds, thirty seconds, two minutes. The rule of thumb during this phase is simple: deliver the reward to the dog on the mat, never call the dog off the mat to receive food. The bed is where all good things happen.

Proofing in the Danger Zone: The Kitchen Ladder

Once your dog understands that the mat is a high-yield zone during quiet training sessions, you must systematically introduce kitchen-specific triggers. Think of this as climbing a ladder, starting with low-arousal prep work and culminating in full-course dinner preparation.

Step 1: Low-Aroma Cold Prep

Equip yourself with a training pouch filled with bite-sized pieces of boiled chicken or string cheese. Send your dog to their place mat.
Walk over to your cutting board and perform a low-value task: wash an apple, slice a cucumber, or tear lettuce. Turn around, walk directly to their bed, and feed them. Return to your cutting board, chop another vegetable, and return to feed them again.
You are teaching your dog an unexpected pattern: your work at the kitchen counter predicts treats appearing on their bed, not from the kitchen edge. Keep these initial sessions under five minutes.

Step 2: The Sound and Motion Triggers

Dogs often respond to auditory cues before they ever catch a scent. The crackle of plastic deli wrappers, the thud of a butcher knife on wood, or the opening of the refrigerator door are classic action cues that send dogs sprinting into the kitchen.
With your dog stationed on their place mat, simulate these noises:
  • Open and close the refrigerator door, then immediately reward on the mat.
  • Rattle a plastic bag, then immediately reward on the mat.
  • Bang a stainless steel pot lightly on the stove, then reward on the mat.
If your dog breaks position and runs toward you, remain calm. Do not scold them. Simply close the pantry or set down the utensil, step into the dog’s space with your body, and calmly guide them back to their station using their collar or a light leash. Reset the drill, take one step backward in difficulty, and try again.

Step 3: High-Scent Cooking

The ultimate test of impulse control involves cooking actual proteins. Sizzling ground beef, frying bacon, or searing fish will flood your home with irresistible scents that challenge your dog’s self-control.
During the first several high-scent dinners, give your dog a long-lasting, focused project on their mat rather than relying entirely on sporadic treats. A frozen rubber toy stuffed with canned meat, peanut butter, and Greek yogurt can occupy a dog for thirty to forty-five minutes.
By pairing the smell of active cooking with an intense, licking-focused activity on their designated bed, you build an automatic associative response: when food is cooking on the stove, my job is to settle on my bed and work on my own puzzle.

The “Oops” Protocol: Handling Dropped Food

Every cook drops food eventually. A slippery piece of raw meat falls from the counter, bounces off your foot, and lands squarely on the tile floor. In an untrained household, this triggers a desperate, chaotic race between human hands and canine teeth.
To keep your kitchen safe, you must establish an absolute rule: dropped food is never fair game.
Practice intentional drop drills outside of actual cooking sessions. With your dog sitting on a leash a few feet away, hold a low-value piece of food, like a baby carrot or a slice of bell pepper. Drop it onto the floor while giving a firm “Leave it” cue.
Cover the dropped food with the sole of your shoe if the dog lunges toward it. The second your dog pulls their nose back and looks up at your face, mark the eye contact and deliver a completely different, much tastier treat from your hand or pouch.
With repetition, your dog learns that ignoring floor spills leads to a superior reward. When an accidental drop happens during actual meal prep, your dog will hesitate and look to you for guidance rather than diving headfirst beneath your feet.

Consistency Across the Household

The greatest enemy of counter-training is inconsistency. If one family member strictly enforces the boundary while another sneakily feeds the dog scraps from the prep board, your training will stall. Dogs are masters of discrimination; they will quickly learn which humans allow counter-grazing and which do not.
Convene a quick family meeting and establish ground rules:
  • No food is ever given directly from the cutting board, counter, or dining table.
  • All kitchen rewards must travel from your hand to the dog’s mat or bowl.
  • If someone is unable to supervise during meal prep, the dog must be placed behind a gate or in their crate with a chew.
Overcoming counter-surfing is rarely a matter of weeks; it is a gradual rewiring of an ancient predatory instinct. But when you replace aimless scolding with strict management, clear boundaries, and valuable alternative jobs, your kitchen changes completely. You get to chop, simmer, and bake in absolute peace, knowing your food is safe and your dog is resting happily in their own lane.
read more
Pet

Guinea Pig Scurvy: Recognizing and Preventing Vitamin C Deficiency

Mention the word scurvy, and most people conjure images of eighteenth-century sailors on months-long voyages, surviving on salted hardtack and brine. It feels like an ancient, obsolete affliction relegated to nautical history books. Yet in the world of exotic companion animals, scurvy remains an active, widespread clinical threat. Every single day, veterinary clinics admit domestic guinea pigs presenting with swollen ankles, brittle bones, painful gaits, and profound lethargy—all traceable to the very same nutritional deficiency that plagued maritime explorers centuries ago.
Guinea pigs are charming, expressive, and seemingly low-maintenance herbivores, which often lures owners into a false sense of dietary simplicity. A bag of generic rodent mix and a handful of carrots might look sufficient on the surface, but it sets the stage for a silent, debilitating health crisis. Understanding the biology of guinea pig nutrition, recognizing the early warnings of a deficiency, and executing a foolproof feeding regimen are the most critical responsibilities of caring for these vocal little companions.

The Missing Enzyme: The Unique Biology of Cavy Nutrition

Unlike dogs, cats, rabbits, and most other domestic mammals, guinea pigs cannot manufacture their own vitamin C. In the overwhelming majority of the animal kingdom, the liver synthesizes ascorbic acid directly from glucose through an internal biochemical pathway. Guinea pigs, however, belong to a tiny evolutionary collective—alongside humans, non-human primates, and certain fruit bats—that lacks the active genetic blueprint for a crucial liver enzyme known as L-gulonolactone oxidase.
Without this specific enzyme, the final conversion step cannot take place. As a result, guinea pigs depend entirely on an external, daily supply of dietary vitamin C to survive.
The biological stakes are immense. Ascorbic acid is not merely a generic immune booster; it is the fundamental enzymatic co-factor required for the synthesis and cross-linking of collagen. Collagen serves as the cellular mortar that binds the mammalian body together. It forms the architectural scaffolding of blood vessel walls, bone matrices, skin, tendons, and cartilage.
When a guinea pig experiences an ongoing deficit of vitamin C, collagen synthesis grinds to a halt. Blood vessels turn abnormally fragile and begin to leak, microscopic hemorrhages spread across muscle tissue and joint capsules, and bones lose their structural density. Within weeks, an otherwise active, thriving pet is subjected to systemic pain and progressive tissue breakdown.

Recognizing the Symptoms: From Subtle Warning Signs to Severe Breakdown

Scurvy, clinically termed hypovitaminosis C, rarely strikes overnight. It is an insidious condition that builds over two to three weeks of dietary shortfall. Because guinea pigs are prey animals, their survival instincts drive them to conceal illness and discomfort for as long as physically possible. Catching the disease in its earliest stages demands keen observation of quiet behavioral shifts.

Early Behavioral and Physical Indicators

In the opening phase of deficiency, a guinea pig often seems vaguely “off.” You might notice that their typically sleek, glossy coat looks unkempt, dull, or continually puffed up as they sit in the corner of their cage. Their eyes may lose their alert shine, and their usual enthusiastic squeaking at the sound of the refrigerator door might dwindle to a weak, disinterested chirp.
Subtle weight loss is another primary indicator. Regular weekly weigh-ins with a digital kitchen scale are essential for every cavy owner, as a downward trend of twenty to thirty grams often signals a brewing problem long before visible physical changes emerge. The animal may also show a mild reduction in appetite, taking longer to nibble through their evening greens or leaving hard pellets untouched.

Progressive Mobility and Musculoskeletal Signs

As collagen degradation advances, the hallmark symptoms of cavy scurvy center squarely on the musculoskeletal system. The periosteum—the sensitive connective tissue membrane sheathing the bones—develops painful micro-hematomas, and joint capsules fill with fluid and blood.
  • The Bunny Hop: Instead of scampering with alternating strides, an affected guinea pig moves with an awkward, stiff-legged hop, using both hind feet simultaneously to spare painful hocks and stifles.
  • Swollen, Hot Joints: The ankles (hocks) and wrists often become visibly enlarged, warm to the touch, and exquisitely tender.
  • Vocalization During Handling: A guinea pig that previously enjoyed being scooped up may suddenly let out high-pitched shrieks of distress when lifted around the rib cage or hindquarters.
  • Total Reluctance to Move: As the pain intensifies, the animal will spend nearly all of their time sitting in a single spot, refusing to walk to their water bottle or hay rack.

Advanced and Systemic Complications

If the deficiency goes uncorrected, the physical breakdown becomes widespread and life-threatening. The blood vessels supplying the gums weaken, leading to inflamed, bleeding oral tissue and loosened incisors. A guinea pig with unstable teeth cannot properly grind fiber, which rapidly accelerates severe dental malocclusion and causes complete anorexia.
Bruising, known as petechiae, may show up on pale mucous membranes and exposed skin. Because vitamin C is essential for cellular immunity, these animals become exceptionally vulnerable to secondary opportunistic infections, particularly severe bacterial pneumonia and ulcerative pododermatitis (bumblefoot). Wounds fail to heal, diarrhea may develop as the gastrointestinal mucosal lining degrades, and without immediate intervention, the condition turns fatal.

Common Care Pitfalls That Fuel Deficiency

Most owners who end up with a scorbutic guinea pig are not neglectful; rather, they have fallen prey to widespread pet-industry myths and aggressive marketing for ineffective products.

The Problem with Water Additives

Liquid vitamin C drops designed for pet water bottles are ubiquitous in retail pet stores, yet they represent one of the biggest hazards in modern cavy care. Ascorbic acid is notoriously unstable. When dissolved in tap water and exposed to light and oxygen, vitamin C breaks down and loses nearly all of its potency within eight to twelve hours.
Worse still, these liquid drops impart a sour, metallic taste to the water. Guinea pigs are extremely sensitive to unfamiliar flavors and smells. Many will drastically cut their water intake or refuse to drink altogether, leading to dangerous dehydration, digestive stasis, and the rapid formation of urinary tract stones. Clean, fresh water should always remain unadulterated.

The Degradation of Fortified Pellets

Commercial dry pellets often boast added vitamin C on their labels, encouraging owners to assume the animal’s nutritional baseline is covered. However, the form of vitamin C used in basic commercial feeds is vulnerable to ambient moisture, heat, and oxygen.
From the day the pellet bag is sealed at the manufacturing plant, the vitamin C content begins to decay. Once the bag is opened in your home, ambient humidity accelerates that decline. By sixty to ninety days after the mill date, even premium fortified feed can lose the vast majority of its active ascorbic acid. Storing feed in warm garages or sunny rooms renders the pellets nutritionally hollow long before the expiration date on the packaging arrives.

The Hazards of Multivitamin Blends

Attempting to treat or prevent scurvy using generic small-animal multivitamins is extraordinarily dangerous. Unlike water-soluble vitamin C, which the kidneys safely filter out when consumed in slight excess, fat-soluble vitamins—specifically vitamins A and D—accumulate within the liver and adipose tissue. Forcing a guinea pig to drink or ingest multivitamin syrups risks toxic liver overload and soft-tissue calcification.

Crafting a Scurvy-Proof Daily Diet

An adult guinea pig requires roughly ten to thirty milligrams of active vitamin C per kilogram of body weight daily simply to maintain baseline metabolic equilibrium. Growing juveniles, nursing sows, and convalescing animals require upwards of thirty to fifty milligrams per day.
Fulfilling this requirement does not require complex chemistry; it simply requires replacing convenience shortcuts with whole foods and stabilized supplements.

Fresh Vegetables with High Bioavailability

Fresh, raw produce should serve as your primary day-to-day vehicle for vitamin C delivery. Not all greens are created equal, however; balance is essential to prevent secondary complications like bladder sludge caused by excessive dietary calcium.
  • Bell Peppers: Fresh sweet bell peppers are the gold standard of cavy greens. They are packed with natural ascorbic acid, boast a low calcium-to-phosphorus ratio, and contain minimal sugar. Green bell peppers are ideal for daily feeding; yellow, orange, and red varieties offer even higher vitamin C concentrations and can be rotated into the bowl several times a week. A quarter to a half of a medium bell pepper per day per pig delivers their entire daily requirement.
  • Dark Leafy Greens: Fresh cilantro (coriander), romaine lettuce, butterhead lettuce, and green leaf lettuce provide excellent hydration and consistent baseline micronutrients.
  • Herbs and High-C Greens in Moderation: Parsley, kale, mustard greens, and dandelion leaves are extraordinarily rich in vitamin C, but they also carry significant levels of calcium and oxalates. Feed these sparingly—once or twice weekly—to prevent the formation of painful calcium carbonate stones in the kidneys and bladder.
  • Avoid Over-Relying on Fruit: While strawberries and oranges contain generous amounts of vitamin C, their high sugar and acid contents disrupt the cavy’s delicate cecal microflora, often triggering painful sores around the mouth (cheilitis) and digestive dysbiosis. Treat fruit as an occasional treat rather than a primary nutrient source.

Stabilized Pellets and Smart Storage

When purchasing commercial pellets, select only those that utilize a chemically stabilized form of ascorbic acid, typically listed on the ingredient panel as L-ascorbyl-2-polyphosphate. This stabilized compound resists oxidation far better than raw ascorbic acid.
Buy pellets in small quantities that you can exhaust within sixty days. Store the feed inside a dark, airtight, food-safe plastic container kept in a cool, air-conditioned pantry. Throw away any pellet stock that smells stale, has been exposed to summer heat, or has passed its manufacturing prime.

Targeted Direct Supplementation

For absolute peace of mind, nothing matches direct, individual supplementation. This method eliminates the guesswork of whether a timid pig is being bullied away from the vegetable bowl by a dominant cage-mate.
Use standardized, hay-based chewable vitamin C tablets specifically formulated for small herbivores. Most guinea pigs view these flavored wafers as a daily treat and will eagerly snatch them from your fingers. Alternatively, plain, unflavored liquid ascorbic acid formulated for children or veterinary use can be drawn into a needleless syringe and given directly into the corner of the mouth. This guarantees exact dosage delivery without altering the taste of their communal drinking water.

Veterinary Intervention and the Recovery Timeline

If your guinea pig is already displaying physical symptoms of deficiency—hopping, crying when handled, or dropping weight—dietary adjustments alone are not fast enough. Scurvy is an active medical crisis that requires an evaluation by an experienced exotic companion mammal veterinarian.
A veterinarian will assess joint stability, evaluate incisors and molars for early alignment issues, and rule out concurrent conditions such as arthritis or bone fractures.
Therapeutic treatment involves aggressive oral vitamin C therapy, frequently dosed at fifty to one hundred milligrams per kilogram daily for one to two weeks to saturate depleted tissues. In addition to high-dose vitamins, comprehensive treatment requires multi-modal supportive care:
  • Pain Management: Non-steroidal anti-inflammatory drugs (NSAIDs), such as meloxicam, are critical for relieving severe periosteal and joint pain, allowing the animal to resume normal movement.
  • Assisted Feeding: If mouth pain or lethargy has caused food intake to drop, syringe feeding with a high-fiber recovery formula is essential to keep the hindgut fermenting and prevent fatal gastrointestinal stasis.
  • Targeted Antibiotics: Secondary bacterial respiratory infections must be addressed quickly with cavy-safe antimicrobials.
The prognosis for scurvy is surprisingly optimistic when medical care begins before irreversible joint ankylosis or severe malocclusion takes hold. Within forty-eight to seventy-two hours of aggressive supplementation, joint inflammation begins to subside, energy levels rise, and appetite returns. Within a week or two, many cavies transition from immobile, hunched distress back to lively popcorn hops and exploratory wandering.

The Foundation of Lifelong Cavy Health

Scurvy is an entirely preventable disease, yet it continues to claim the mobility and lives of guinea pigs simply due to educational gaps. These creatures depend wholly on their caretakers to bridge the biochemical divide left by their evolutionary past.
By discarding unpredictable water drops, relying on crisp daily bell peppers, refreshing fortified pellets regularly, and providing direct supplemental tablets, you effectively shield your companion from an excruciating condition. A well-nourished cavy is an active, vocal, long-lived family member whose daily joyful wheeks and lively antics will reward your nutritional vigilance for many years to come.
read more
Dog

Controlling Heavy Undercoat Shedding Without Shaving Your Dog

Every spring and autumn, homes with double-coated dogs transform into temporary textile mills. Tufts of pale, woolly fluff drift across hardwood floors like tumbleweeds, attach themselves to freshly laundered fleece jackets, and settle comfortably into morning cups of coffee. When you brush your dog for forty-five minutes and produce a pile of hair large enough to assemble a second canine, only to watch another clump slip loose as they shake, desperation sets in.
It is during these intense shedding cycles that the siren song of the clipper blade begins to whisper. The idea of taking a double-coated dog—be it a German Shepherd, Siberian Husky, Golden Retriever, Great Pyrenees, or Australian Shepherd—to the groomer for a complete summer shave sounds delightfully tidy. One quick haircut, and the endless vacuuming stops.
Yet running clippers down the back of a double-coated dog is one of the most detrimental mistakes an owner can make. Shaving does not stop shedding; it merely causes your dog to shed shorter, bristly hairs that embed themselves into upholstery like barbed needles. More importantly, it destroys an intricate biological climate-control system that took thousands of years of evolution to develop.
Controlling heavy undercoat shedding is entirely possible without reaching for the razor. It requires understanding how double coats function, investing in mechanical extraction rather than surface shearing, and adopting the techniques professional groomers rely on to blow out coats quickly and cleanly.

The Dual Architecture: Why Shaving Breaks the System

To understand why clippers are catastrophic for double-coated breeds, you have to examine the anatomy of their fur. Unlike single-coated breeds like Poodles or Shih Tzus, whose hair grows continuously in single strands, double-coated dogs carry two entirely different types of hair within each follicle.
The outer coat consists of long, smooth, lustrous guard hairs. These hairs are stiff, weather-resistant, and rich in natural pigmentation. They act like an impermeable raincoat and a reflective shield, repelling water, deflecting thorny brush, shielding delicate skin from harmful ultraviolet radiation, and preventing insect bites.
Beneath the canopy of guard hairs lies the undercoat: a dense, downy layer of soft, crimped, fibrous wool. This layer functions exactly like household fiberglass insulation. In freezing winter weather, it traps pockets of warm air generated by the dog’s body heat, creating a thermal barrier against the frost. In blistering summer heat, it works in reverse, trapping cool air against the skin and buffering the dog’s core against external radiant heat.
When you shave a double coat, you strip away both layers indiscriminately. Guard hairs grow exceptionally slowly, while the soft undercoat grows back at breakneck speed. The result is a clipped coat that returns completely unbalanced: the fuzzy undercoat dominates the surface, soaking up moisture like a sponge, matting easily, and turning into a felted blanket that traps ambient heat against the skin instead of deflecting it.
Even worse, shaving exposes dogs to severe sunburn and heatstroke, and frequently triggers post-clipping alopecia, a condition where hair follicles go dormant for months or years, leaving the dog patchy, leathery, and stripped of natural protection.

The Mechanical Toolkit: Gear That Actually Works

Most commercial dog brushes sold in big-box retail stores do nothing more than skim the topmost layer of guard hairs. They make the dog look temporarily polished while leaving dense, impacted undercoat trapped against the dermis. Conquering shed season requires targeted mechanical tools designed to penetrate the outer canopy and release the dead wool underneath.

The Undercoat Rake

An undercoat rake features a single or double row of smooth, rounded metal pins set into a sturdy handle. Look for pins that are long enough to reach down through the outer coat without scraping roughly against the skin. As you draw the rake through the coat, the rotating pins glide between the slick guard hairs, catching the crimped, loosened undercoat fibers and extracting them in smooth ribbons.

The Long-Pin Slicker Brush

Standard slicker brushes with short, bent wires are fine for toy breeds, but heavy shedders require a heavy-duty, curved slicker brush with long, flexible stainless steel pins. The curvature of the brush pad allows the pins to gather vast quantities of loose hair without requiring heavy wrist pressure. This tool is indispensable for smoothing out thick trouser hair, feathers, and chest ruffs.

The Steel Greyhound Comb

Often overlooked, a simple dual-spaced metal comb is the ultimate truth-teller of coat maintenance. The wide-spaced side checks for undetected snarls, while the fine-spaced side collects residual fine wool. If a steel comb cannot glide effortlessly through the fur from the skin line to the ends of the guard hairs, dead coat remains compacted beneath the surface.

A Warning on Bladed Carding Tools

Tools with closely spaced, razor-sharp serrated blades are heavily marketed for deshedding. While they pull out staggering mountains of fur, much of that hair has not shed naturally; the hidden micro-blades are actively slicing through healthy, living guard hairs. Overusing bladed tools will shred your dog’s topcoat, leaving it dull, broken, and frayed. Rely primarily on smooth, blunt pins and tines.

The Professional Blowout: Water and High-Velocity Air

The single most effective secret of professional grooming salons is not a brush; it is air. If you only brush dry fur, you are fighting friction, static electricity, and natural skin oils that glue dead undercoat in place. The definitive cure for a heavy coat blow is the bath and force-dry method.

1. The Critical Pre-Bath Brush

Never plunge an impacted, tangled dog straight into a bath. When dead, compacted undercoat gets thoroughly soaked, it shrinks and felts like a wet wool sweater, turning minor tangles into rock-hard mats that are nearly impossible to remove without cutting. Spend twenty minutes running an undercoat rake through your dog’s densest areas before running the water.

2. Targeted Conditioning and Slip

Bathe your dog using warm water, which naturally helps relax hair follicles. Apply a rich, high-performance deshedding shampoo, massaging it down to the skin to dissolve sebum and dirt.
However, the real transformation occurs during the conditioning step. While many owners skip conditioner out of fear of making the dog greasy, a silicone-rich or botanical-oil-infused deshedding conditioner is non-negotiable. Conditioner coats each individual hair shaft, closing the microscopic cuticles and creating extreme mechanical slip. When the cuticle is smooth, dead undercoat hairs glide out of their follicles with zero resistance instead of snagging on neighboring strands.

3. The High-Velocity Force Dryer

If you own a heavy-shedding dog, purchasing a variable-speed high-velocity pet dryer is the single best investment you will ever make. Unlike human hair dryers, which rely on baking heat that can dry out canine skin and singe fur, force dryers use raw air volume and kinetic pressure at room temperature.
Towel-dry the dog thoroughly, then bring the force dryer nozzle within an inch of the skin. Move the nozzle back and forth in tight, controlled rhythmic motions. The high-speed jet of air parts the wet guard hairs, gets under the dead wool, and literally blasts clouds of trapped undercoat straight out of the follicles into the air.
Perform this step outside or in an enclosed garage; the sheer volume of fur expelled during a high-velocity blowout is astonishing. By the time the dog is fully dry, roughly seventy percent of the loose undercoat that would have covered your home over the following two weeks will have vanished in thirty minutes.

The Art of Line Brushing

Once the coat is clean, conditioned, and blown out, manual brushing becomes fast, satisfying, and deeply effective. However, the technique matters just as much as the tool.
The most common mistake owners make is sweeping a brush across the top of the dog’s back in broad, sweeping strokes. This only polishes the tips of the guard hairs while ignoring the undercoat beneath. Instead, use the technique professional handlers call line brushing.
  • Start low on the dog’s body, such as the lower rear leg or the base of the hip.
  • Use your non-dominant hand to push the coat upward and hold it flat against the body, revealing a straight line of bare skin.
  • With your dominant hand, take your slicker brush or rake and brush a small section of fur downward away from the line of skin, working in short, gentle strokes.
  • Once that strip is clear and smooth, move your non-dominant hand up one inch, exposing a new line of skin, and brush that next layer down into the previously groomed section.
  • Work methodically from the feet up the legs, across the flank, along the spine, and through the neck.
Line brushing guarantees that your tools reach the absolute base of the follicle without scratching the skin. Once you finish a section with the brush, run your steel greyhound comb through the same area. If the metal teeth pass through cleanly down to the roots, that area is free of dead hair.

Nutritional Support for Healthy Coat Retention

External grooming addresses hair that has already loosened, but what happens inside the body determines the strength and lifespan of the hair follicle itself. When a dog’s skin is chronically dry, inflamed, or deficient in critical fatty acids, hair follicles weaken prematurely, causing excessive, constant shedding outside of normal seasonal cycles.
Ensure your dog’s diet includes adequate levels of omega-3 and omega-6 fatty acids, specifically eicosapentaenoic acid (EPA) and docosahexaenoic acid (DHA) derived from cold-water marine sources like wild salmon, sardines, or menhaden fish oil. Plant-based oils like flaxseed contain alpha-linolenic acid (ALA), which canines convert to usable EPA and DHA with poor efficiency. Marine-derived fatty acids nourish the cutaneous lipid layer, reduce cellular inflammation, and anchor hair shafts firmly in their follicles until the true seasonal shedding cycle triggers release.
Hydration also plays a silent, pivotal role. Indoor winter heating and dry summer air conditioning dehydrate your dog’s skin, leading to microscopic flaking and erratic hair loss. Ensure your dog drinks plenty of clean, fresh water, and consider adding moisture to meals through bone broth or canned food.

Establishing a Sustainable Rhythm

Tackling a heavy undercoat is not an all-or-nothing marathon that happens once a year; it is about maintaining a steady, low-stress operational rhythm.
During the primary coat-blowing transitions of spring and autumn, commit to ten to fifteen minutes of line brushing every other day, paired with a monthly warm bath and high-velocity blowout. During the quieter winter and summer months, a single weekly maintenance session with an undercoat rake and steel comb will easily keep your home fur-free.
A heavy double coat is not a domestic design flaw that needs to be sheared away with clippers. It is an extraordinary piece of biological engineering that shields your companion from freezing winds, scorching sun, and environmental hazards. By substituting the quick fix of shaving with the right tools, proper washing technique, and methodical line brushing, you protect your dog’s health while restoring absolute peace and cleanliness to your home.
read more
1 2 3 … 19
Page 1 of 19